 I recently attended the Iowa 1:1 conference #i11i in Des Moines. I attended a session presented by Leslie Pralle Keehn and Erin Olson. Their session was titled Out My Window #omw1314. This presentation was a great hands on workshop where participants got to apply what was being discussed. Upon returning to my classroom the next day, we had a writing assignment that would allow my first graders the chance to practice adding descriptions to their writing. The original plan was to work on adding descriptions to student created make believe characters. My class has been piloting a class set of LearnPad tablets. It just so happened to be a beautiful day outside. We decided to scrap the original plan of make believe characters and apply the Out My Window project to our lesson. Why not create a project where students were able to write about a personal connection while still practicing adding descriptions. Students took their tablets outside and snapped a picture of their favorite piece of recess equipment. Once everyone had an image, we returned to the class to begin our descriptive writing. My students used the Aviary photo editing app on their LearnPads to annotate over the top of their image. Typically we spend the week brainstorming, drafting, editing, and revising before publishing a final piece. Along the way there are lots of students that need support and pushed to complete the assignment. I was amazed at what my first graders were able to do with this project. The only guidance I gave them was to add descriptions about the following: 1) What you do on your image, 2) What you hear, and 3) How it makes you feel. Students were totally engaged throughout this process and not one student needed assistance with brainstorming what to write. I am always blown away with the power of a PLN. I attended a great session with two tech leaders that I had talked with more on Twitter than in person. I was able to take their ideas and apply it to my own classroom. Providing my students with a task that provided a personal connection alleviated a lot of the struggles typically experienced with early writers. Below are some of the final results that my students were able to produce in a short amount of time. Their final products were published to their blogs. A great reminder how important it is to given student choices and provide authentic opportunities to apply common core skills. 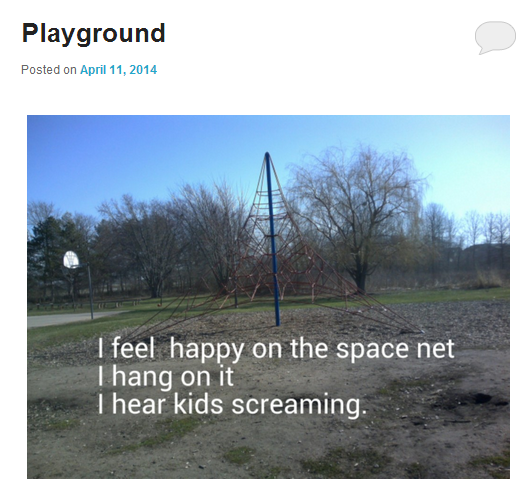 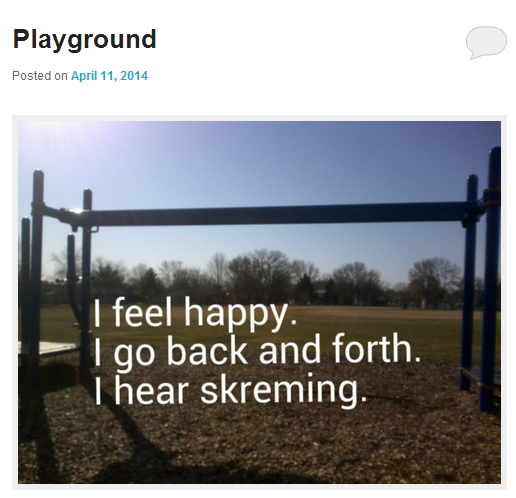 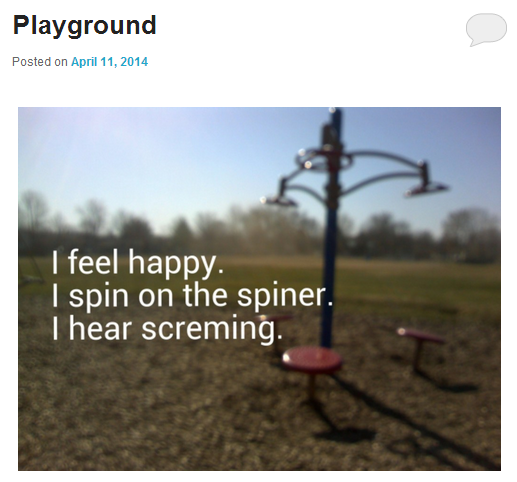 Share This:
1 Comment
**If you are unfamiliar with this project, check out my first post introducing my pilot project with LearnPads and comparing them to iPads. Assessing: 3 optionsI think it is a safe bet to say that all teachers use assessment tools to gather data and inform instructional decisions. Whether it is formal, digital or just observations, assessing student understanding is weaved into a teacher's pedagogy. With time being a critical asset to all teachers, having some digital options for collecting data can be a huge time saver. As I have implemented both the LearnPad and iPad, I have tried a variety of digital tools that can assist in gathering that valuable information to guide instructional decisions. However, the biggest game changer to date has been having a connected device in the hands of all my students. Regardless of the LearnPad or iPad, the digital tools I explain below are one piece of the puzzle to promote 1:1 learning environments. Option 1: Socrative Whether Socrative for IOS or for Android, this tool allows you to create a digital classroom to collect feedback from students. Students do not have to register. They simply type in the virtual room number of their teacher's classroom. You can create multiple choice, true/false or even short answer assessments. One nice feature is the ability in add pictures to your questions. You can give quizzes in self or teacher paced modes. It is a very simple and intuitive user interface for creating and administering assessments. You can even share your created assessments. A popular feature is running assessments in "Space Race" mode which creates a little competition. When assessments are completed, you can choose to email the report or even save it as an Excel file. Socrative works on almost any connected device. 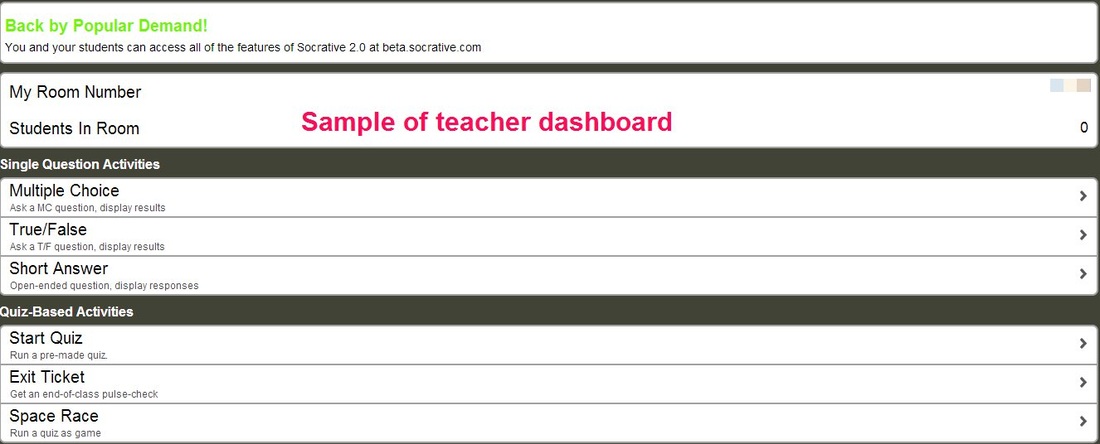
Option 2: Exit Ticket Exit Ticket is a new tool that I have only recently started using. There is an IOS as well as Android version of the app. The more I use this tool the more I love it. It's user interface for the teacher is a little more complex than Socrative. However, it is very feature rich and customizable based on your needs. Below is a screenshot of a completed assessment. One amazing option of Exit Ticket is the ability to view the same information below in real time as the assessment is being administered. Much like Socrative, you can set up multiple choice, true/false and free response. Socrative allowed you to insert images with your questions. However, Exit Ticket not only lets you insert images with your questions but also with your answers as well. 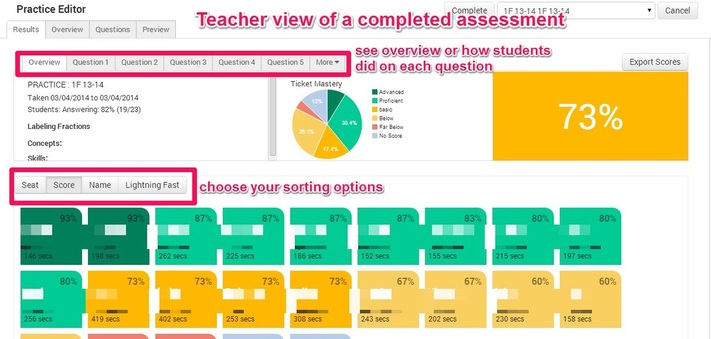
Option 3: Google forms + FLubaroo Flubaroo is a script that auto checks submitted Google Forms. This is definitely a prime example of working smarter and not harder. Google Forms allows you many options for creating assessments. You can add videos, images, multiple choice, short answer and more for your questions. You can even have multiple pages and create actions based on how a student answers a question. So if a student answered one question incorrect, you could have it take them to a second page with some similar questions to provide some alternative options to demonstrate their understanding.
We have used this combination for the entire school year. Students watch the daily math lesson and then take a quiz via Google Forms. I run the Flubaroo script which auto grades the quiz. From this information, I am able to group students in math based on their needs according to the Google Form assessment. IN CLOSING These three options are great digital assessment tools to add to any teacher's toolbox. Just like any piece of tech, there is no Swiss Army knife application that does it all. I use a combination of Google Forms/Flubaroo and Exit Ticket based on the skills and curricular areas I want to assess. As I mentioned earlier, I think these three tools help reinforce the benefits of student learning and teacher pedagogy in a 1:1 environment. Not that this couldn't be done in environments that are not 1:1, but the ability to gather real time data puts those classrooms at an advantage when implemented with integrity.
**If you are unfamiliar with this project, check out my first post introducing my pilot project with LearnPads and comparing them to iPads. We have been learning about the vowel digraph "oo" as in the word cook. We practiced with this vowel digraph as a whole group frequently throughout the week. In addition, students had the chance to demonstrate their understanding of this new digraph by creating a picture quiz for their classmates to complete. 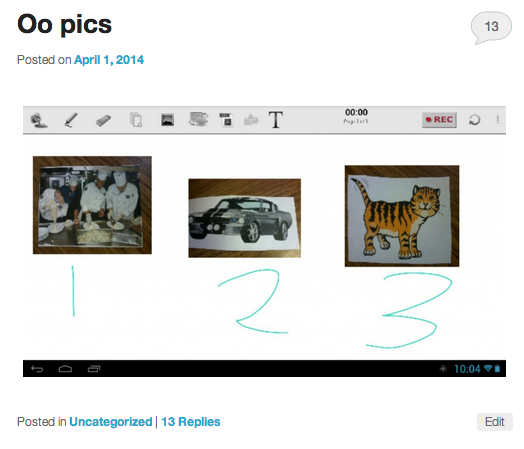 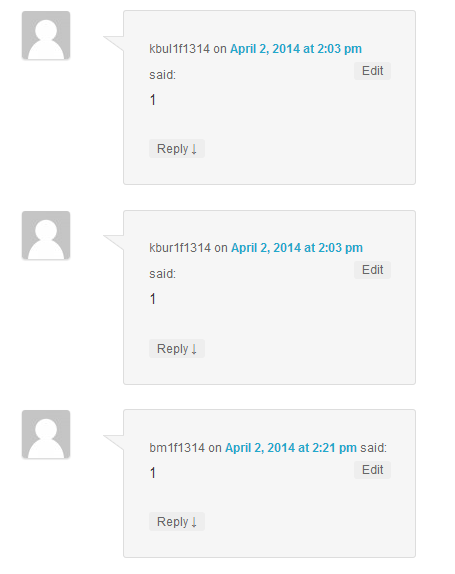 Above is an example of a completed product made by a student. There were pictures posted around the classroom. Students had to snap a total of three pictures. One of the pictures had to be an example of the "oo" digraph while the remaining two pictures did not. When they were done snapping pictures, they had to label each picture with a number. Their final picture collage was added to their blogs. The next day, students spent time looking at all their peers' posts about the "oo" digraph. They left comments with their guess as to which picture was an example of the "oo" digraph. By completing this activity, students had to apply their understanding of the digraph as they sorted through pictures. In addition, by posting it to the blog, students had to differentiate between the images as they made their guess as to which number/picture combination represented the "oo" digraph. So how did my students accomplish this activity. I needed a way for them to snap the pictures, put all the pictures on the same page as well as be able to write a number under each image (1, 2, 3). Check out the methods below that could be used on both the iPad and LearnPad. Pic collage--LearnPad or iPad PicCollage is both an IOS and Android app. It allows you to snap pictures or add them from your library/gallery. You can then add text to your collage. Below are the steps for creating the collage that my students would have followed.  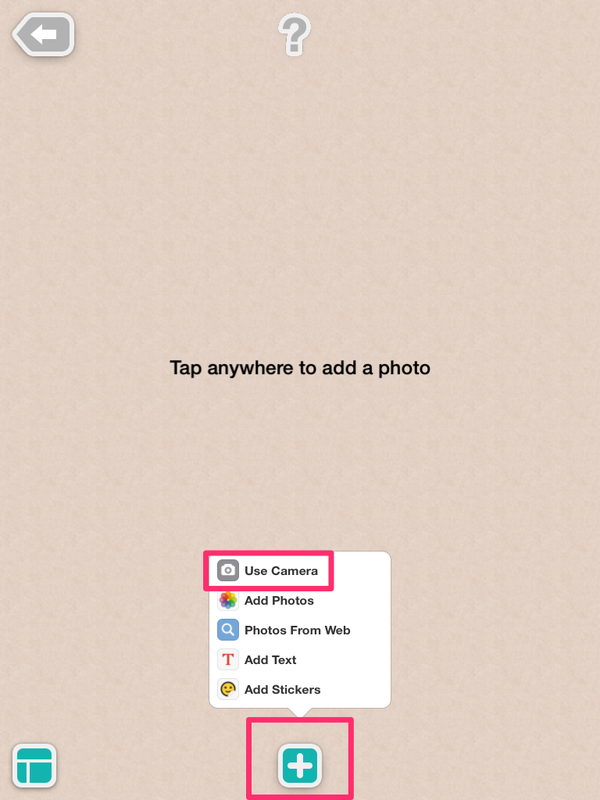 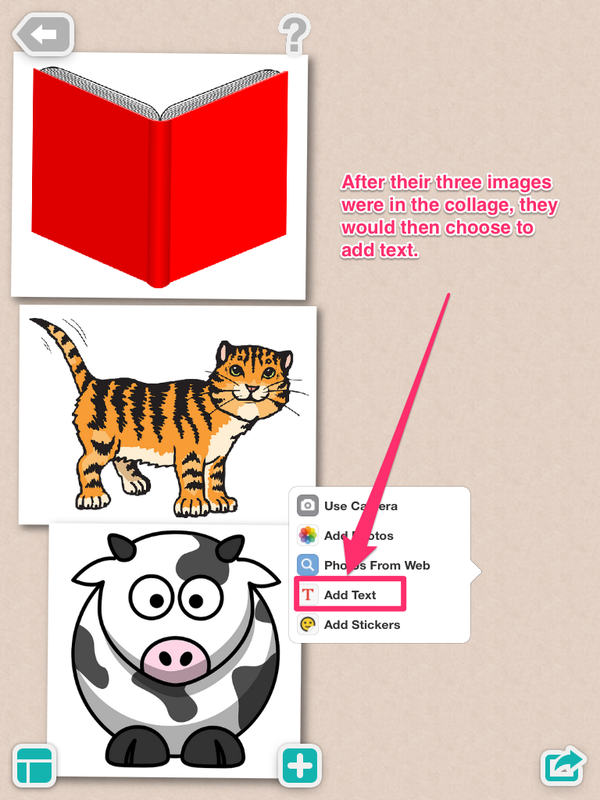 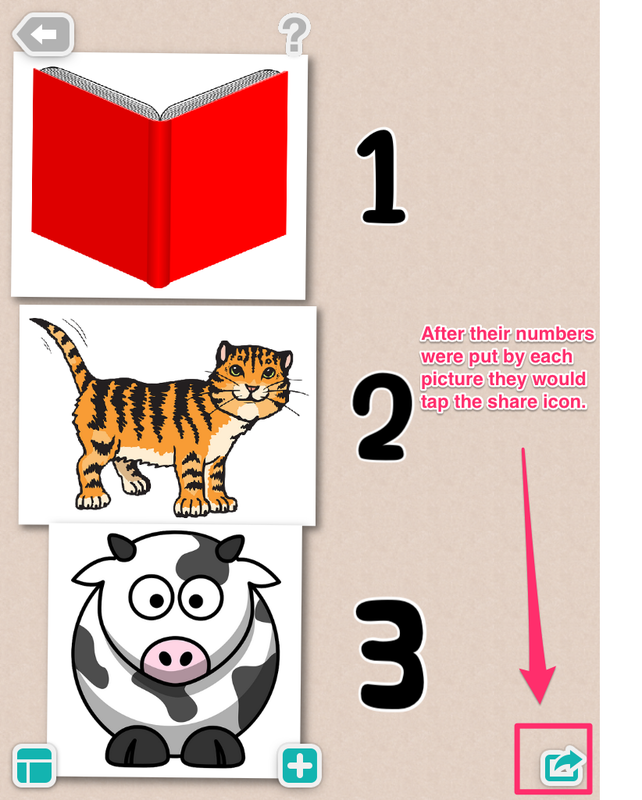 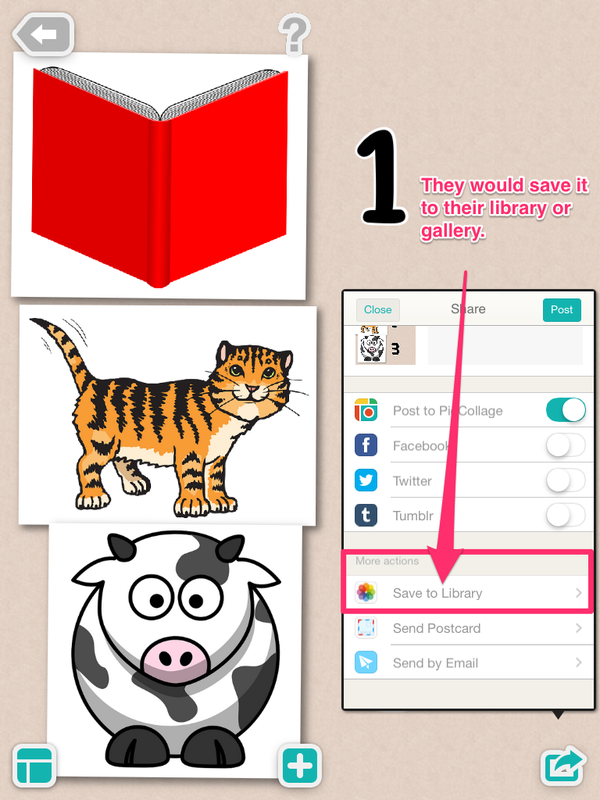 When students had the image saved to their camera roll, they would then open up their blogging app (Edublogs on the LearnPad and Kidblog on the iPad). They would then publish a new post with their newly created collage. LearnPad: Lensoo Create App Below is an example of using the Lensoo Create app to create a pic collage. You are not recording with this screen casting app but using it as a blank canvas. You can see the directions below for completing the "oo" assignment with Lensoo Create instead of the Pic Collage app. 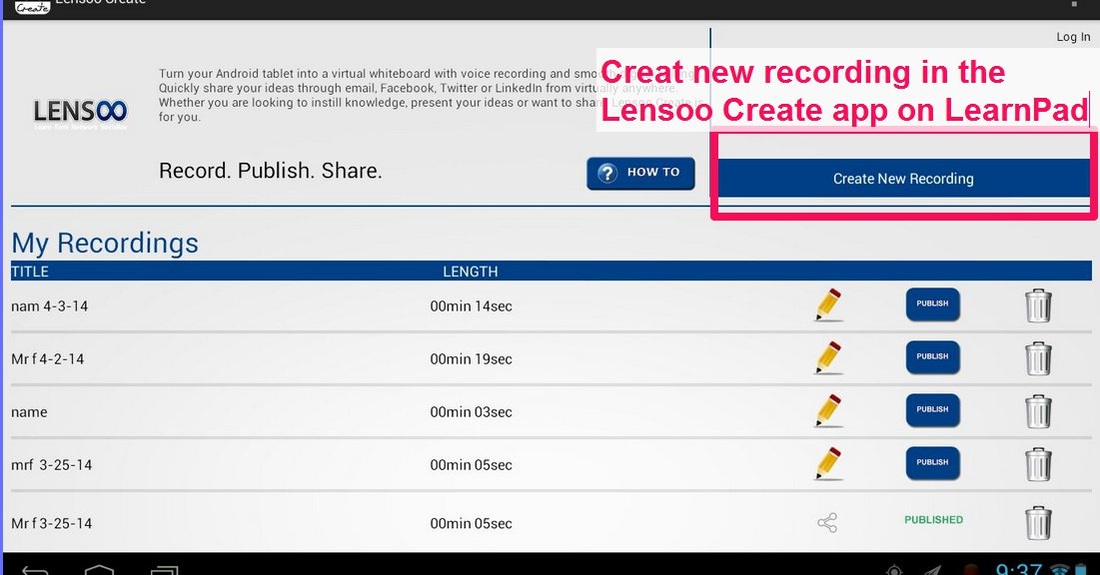 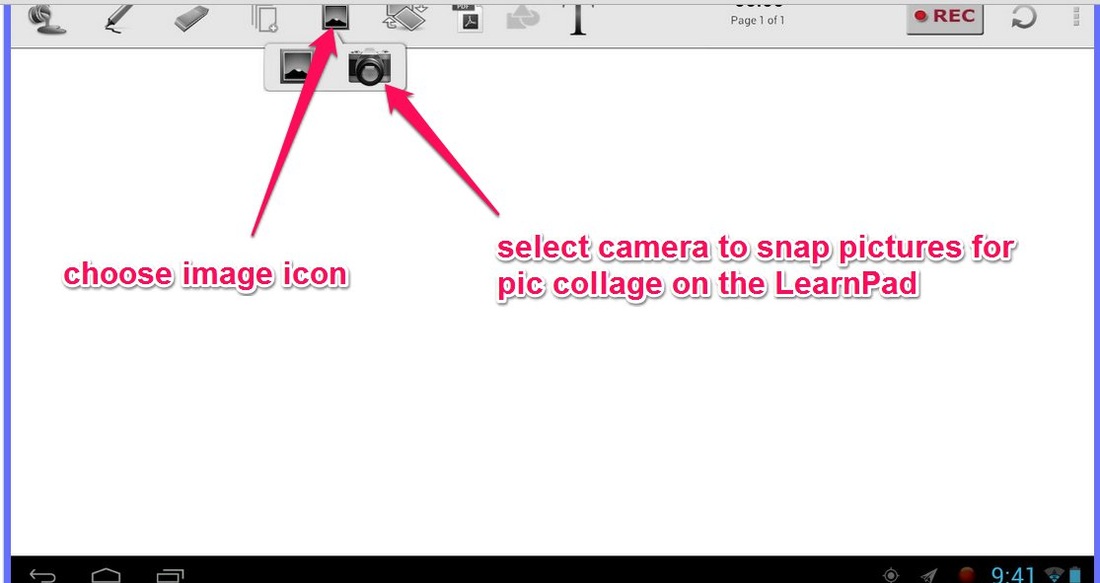 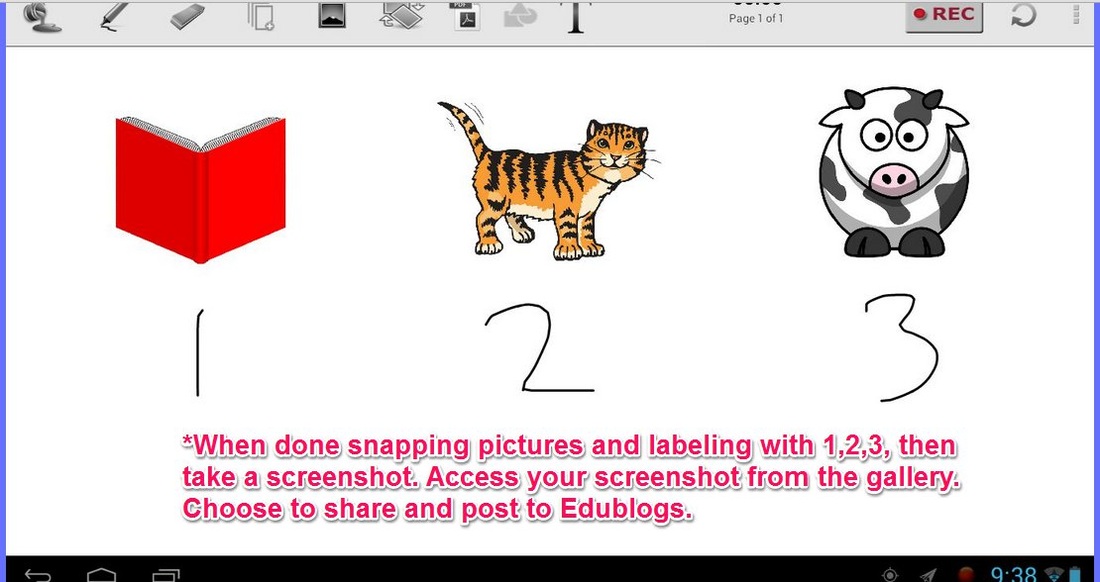 iPad: Educreations App Below is an example of using the Educreations app to create a pic collage. You are not recording with this screen casting app, but using it as a blank canvas. You can see the directions below for completing the "oo" assignment with Educreations instead of the Pic Collage app. 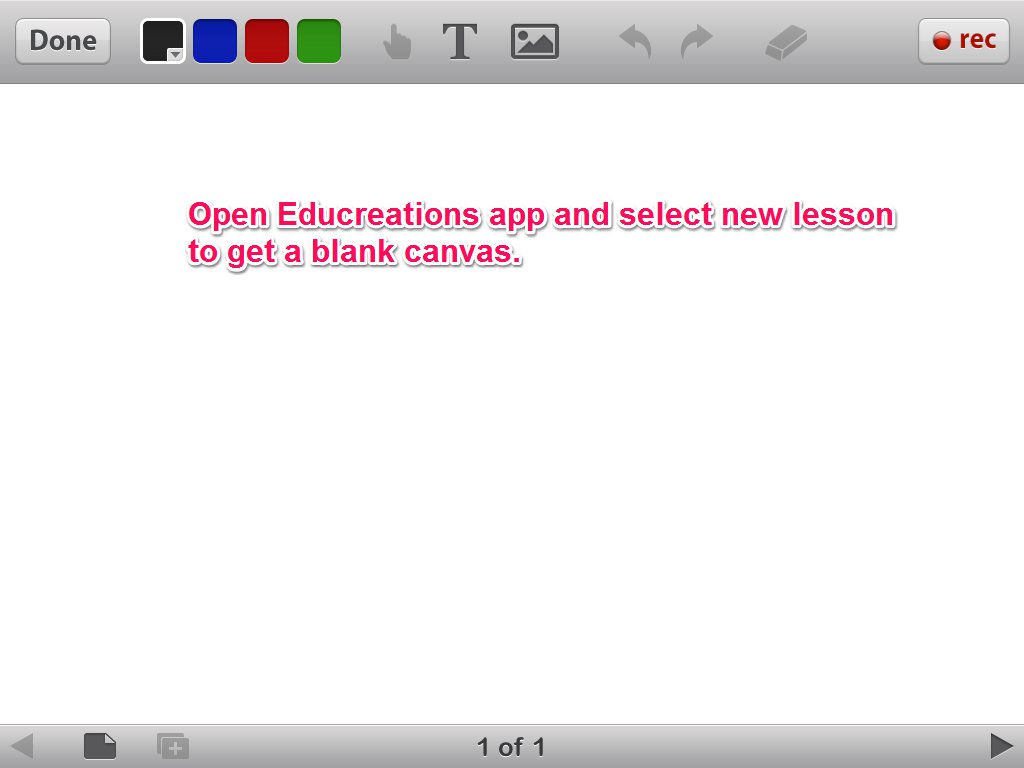 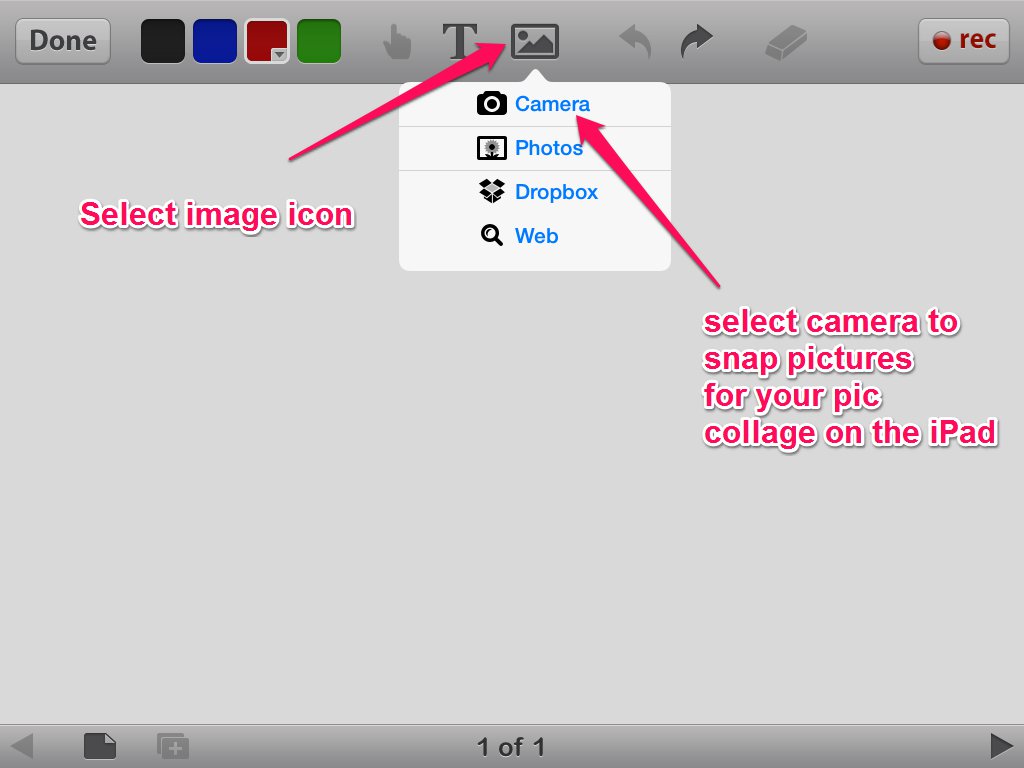 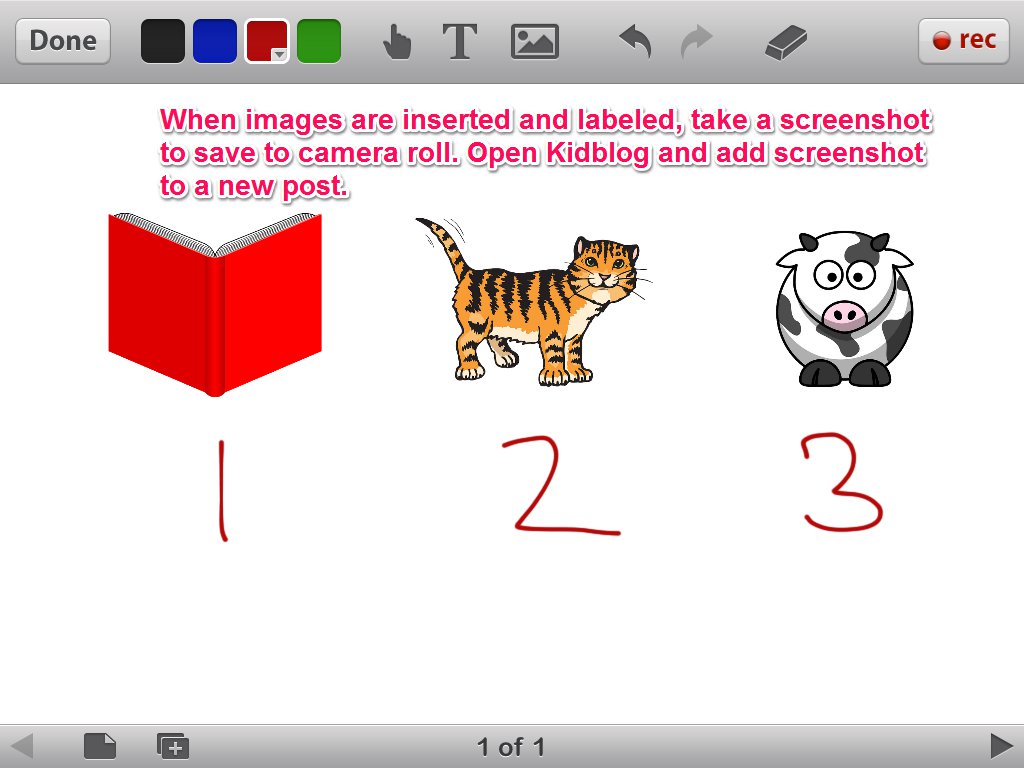 Share This:
**If you are unfamiliar with this project, check out my first post introducing my pilot project with LearnPads and comparing them to iPads. As my students have been using the tablets in my classroom, we have been working on a paperless workflow. You can see how the paperless workflow can be done on the LearnPad as well as on the iPad. When my students have finished annotating a PDF assignment, the app they use allows them to export their completed annotation as a .jpg file. This file is saved into their Dropbox folder which is shared with my personal account. By having students save their completed work into the shared folder, I am able to access their files on my own devices, record my feedback and export the video feedback back into each students' folder. There are two methods that I have used to complete this process. I have used the Explain Everything app on my iPad. This app allows you to bring images in directly from Dropbox. This means I don't need to save the images to my camera roll first. Once I have the image opened in the Explain Everything app, I can annotate over the image and use a point to highlight items that need some brief reteaching or praise. Once my feedback is done, I then export the finished product into the student's folder. **The reason I chose the iPad as the winner was based on Explain Everything being accessible on the iPad. It is an Android app as well, but there is a different process for obtaining paid apps on the LearnPad marketplace. One problem with Explain Everything is that it cost money to purchase the app. Another alternative that I have used is the TechSmith Snagit extension for Chrome that recently enabled screencasting. I am able to open to open Chrome, open the web version of Dropbox, open the student's file, view the original size of their file, open the Snagit recording option and provide my video feedback . The only downside to this option is that when I am done, the video is automatically saved to Google Drive. This means that I have to go into my student's Dropbox folder and upload the video file into their folder so they can see the video feedback I provided. If we used Google Drive as our cloud storage workflow option, this method would work seamlessly. It still is a great FREE option for providing video feedback. Explain Everything OptionTechSmith Snagit optionShare This:
**If you are unfamiliar with this project, check out my first post introducing my pilot project with LearnPads and comparing them to iPads. My first graders have been working on writing dialogue. This can be a tricky task for any grade level. Figuring out where to put quotation marks, commas, periods, questions marks can be a nightmare. In an attempt to make this more relative to their lives as well as integrate our tablets, we utilized a couple apps to create short videos showcasing dialogue. I will outline the process for both the LearnPad and iPad below, as well as add a video explanation at the end of this post. In a nutshell, students used a paper template to record a question they would ask mom or dad as well as their mom or dad's response. After having their paper script, they used the Tellagami app to create their avatars and record their paper scripts. After creating their two Tellagami videos, they used a video editing app to mash both video clips together. Their merged video clips were then posted to their blogs to showcase their understanding of dialogue when writing. LearnPad: Dialogue Writing Steps Students began by writing out their scripts using a paper template. You can see it below and download it for yourself here. 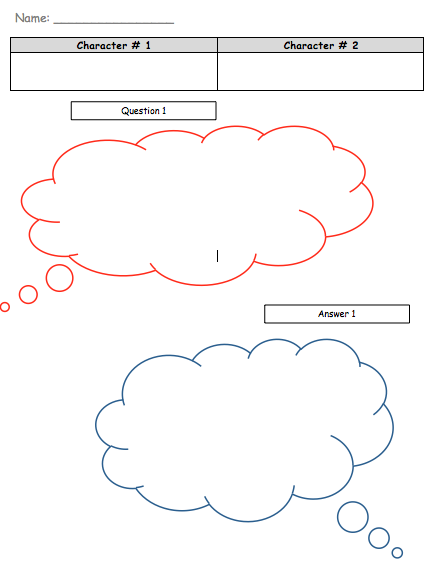 After completing their paper script, they opened up the Tellagami App. This app allows you to create an avatar. After you have created your avatar you are able to record up to a 30 second message which your avatar will speak when all done. 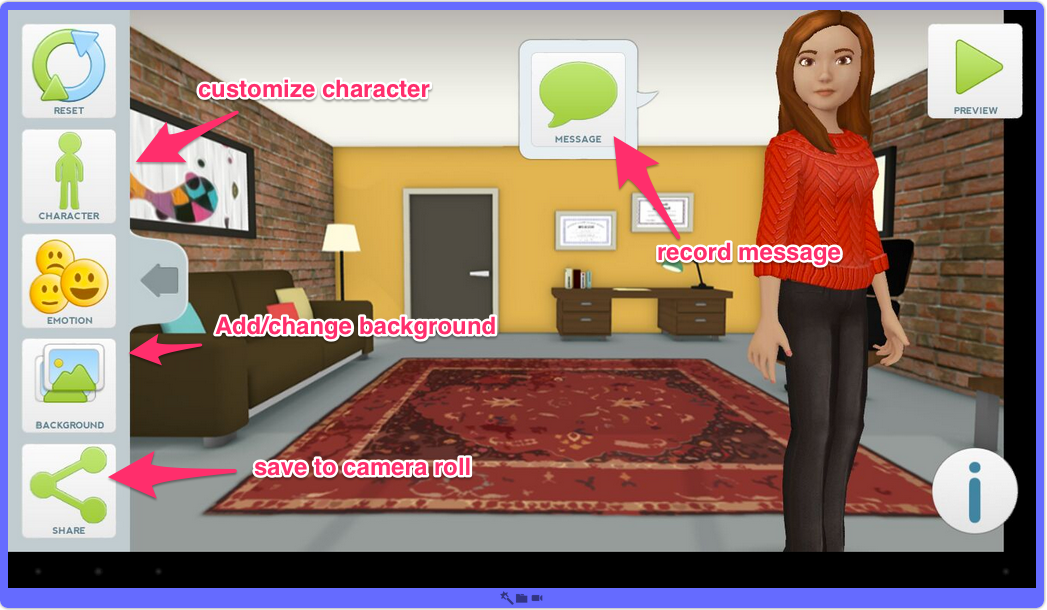 After recording a message for both of their characters (themselves and mom or dad), they opened up the Movie Studio Video Maker app to merge both of their video clips into one final movie. 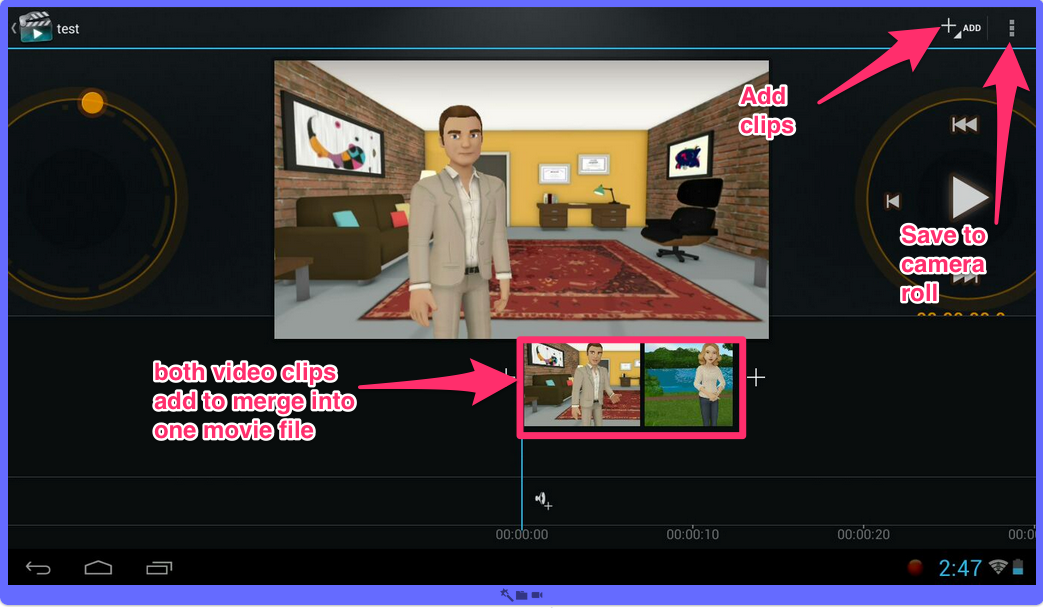 Once they had both video clips merged into one movie, they then opened up Edublogs to post their video and share their understanding with dialogue. Below is a sample that a student created. **Within the video editing app, you can trim your videos. We could have trimmed the Tellagami brand at the end of each video. However, with this being our first experience with the video editing app, we chose to keep the steps simple. iPad: Dialogue Writing Steps The steps on the iPad would be identical up until video editing. Students would have started with their paper scripts. Once their paper scripts were done, they would then open the Tellagami app, customize their avatars, record their message and save to the camera roll. When they got to the video editing, they would open up the Perfect Video app. Once opened, they would create a new project. Once in their new project, they would be able to add in their two video clips. 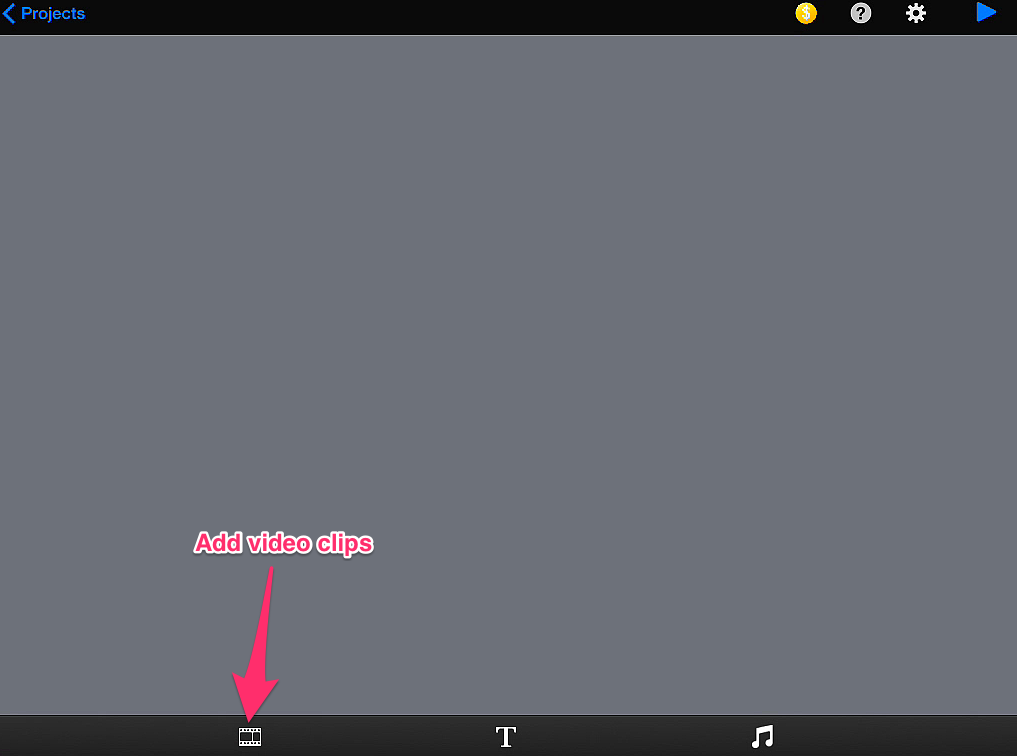 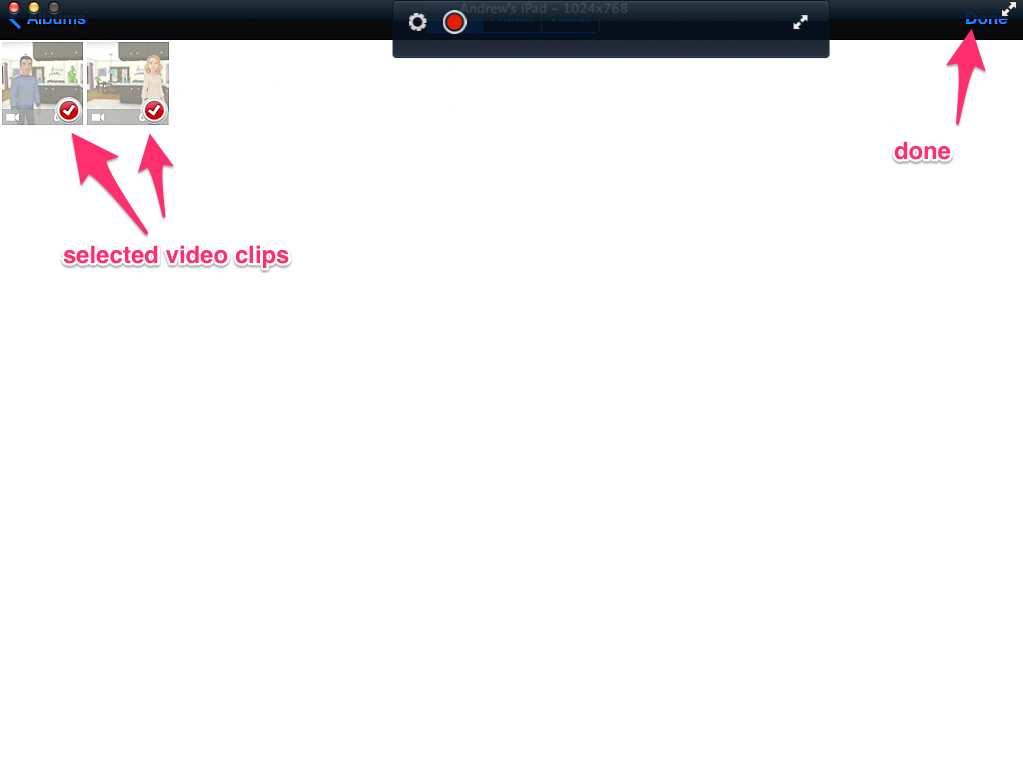 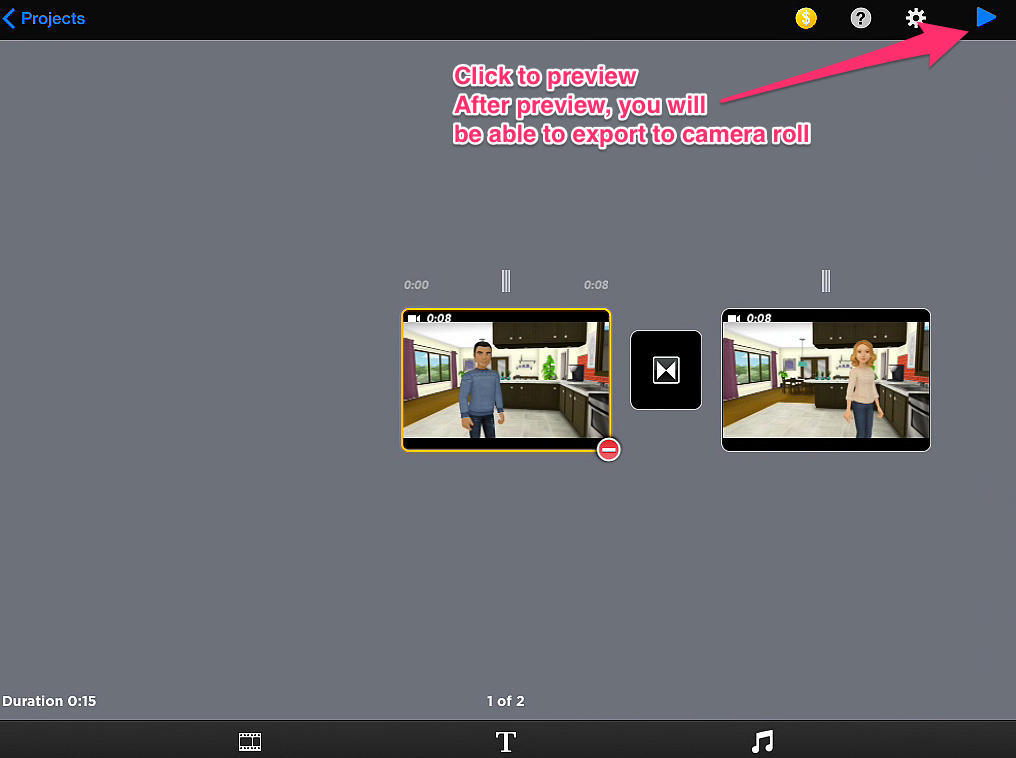 After they had merged their video clips into one movie file and exported it to their camera roll, they would then open up their Kidblog app. Once in the Kidblog app, they would create a new post, add their movie file from the camera roll and publish their post to share their understanding of dialogue. Video Comparison of processShare This:
**If you are unfamiliar with this project, check out my first post introducing my pilot project with LearnPads and comparing them to iPads. My first graders have been working with bossy "r" combinations. Recently we spent some time sorting images based on having the bossy "r" vowel sound or not. Check out my previous post about Bossy "R" sorting. To continue integrating the LearnPads into our daily instruction, students created Pic Collages of images representing bossy "r" combinations. The images we used are accessible below. These images were posted around the classroom. Before starting, students had to determine which bossy "r" combination they would be "hunting" for during this activity (ar-images, or-images, ir, er, ur-images). After they decided on a bossy "r" combination, they used the Pic Collage app to snap pictures of only those images that represented their chosen bossy "r" combination. Once their Pic Collage was created, it was then posted to their blog. The following day, students spent time accessing their peers' blog posts with their Pic Collages. It was then their job to comment with their guess as to which bossy "r" combination was represented in the Pic Collage. LearnPad: Bossy "R" Pic COllages Steps for Bossy "R" pic collages Below are the apps we used on the LearnPad.  1) Open the Pic Collage app to get started. 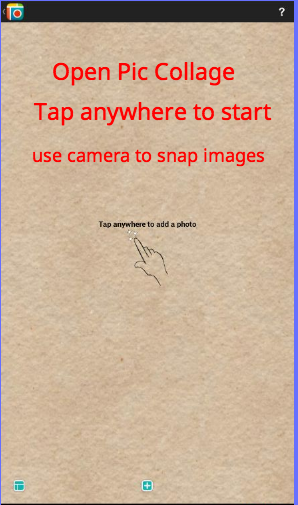 2) Snap pictures using the built in camera. Click share icon when done with collage. 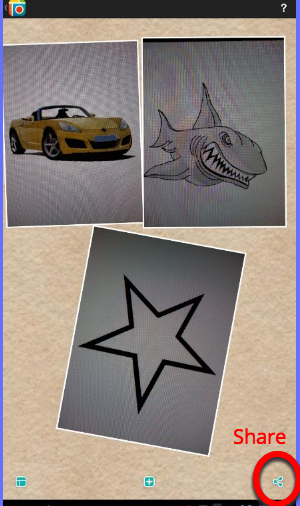 3) Share to Edublogs. 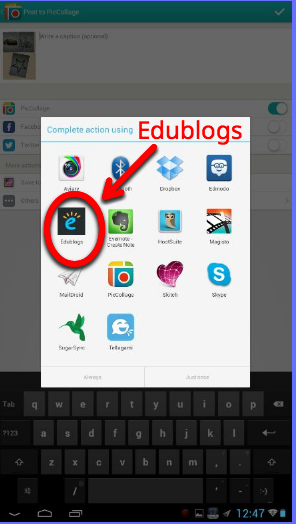 4) Give it a title and tap the airplane to publish live. 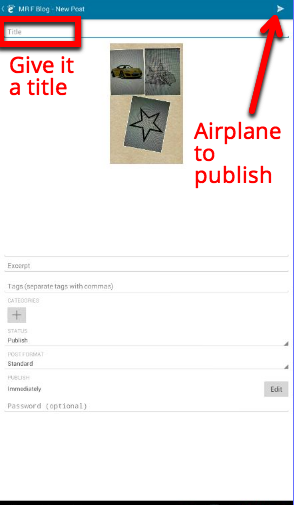 iPad: Bossy "R" Pic Collages Steps for Bossy "R" Pic Collages Below are the apps we would use on the iPad. 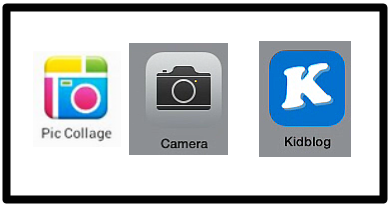 *The steps for creating the collage would be identical to the LearnPad until you got to the blog post step. One big difference would be saving your completed Pic Collage to the camera roll before being able to post it to Kidblog. Once the image was saved to your camera roll, you would then be able to open up the Kidblog app and create a new post. Insert the collage from the camera roll, give the post a title and click Publish to make it live. Share This:
**If you are unfamiliar with this project, check out my first post introducing my pilot project with LearnPads and comparing them to iPads. When learning to read in first grade, we spend time learning about the bossy "r" or "r" controlled vowels. To utilize our tablets and provide practice, we completed a sorting activity with bossy "r" combinations. The goal of this activity was for students to demonstrate their understanding of bossy "ar" combinations by sorting pictures based on having the bossy "ar" sound or not. Students would insert a background image into a sceencasting app. After the background image was inserted, students then inserted some pre-selected images. Once these images were inserted, students spent time sorting the pictures into a bossy "r" or "other" category. When all images were sorted, a screen shot was captured and in turn posted to their blog. The process is highlighted below for both the LearnPad and iPad. LearnPad: Bossy "R" Sorting I had to do some backend work prior to this activity so that the images were all accessible for students. You can download the images that I used by clicking here. We used the apps below to complete this sorting activity on the LearnPad. 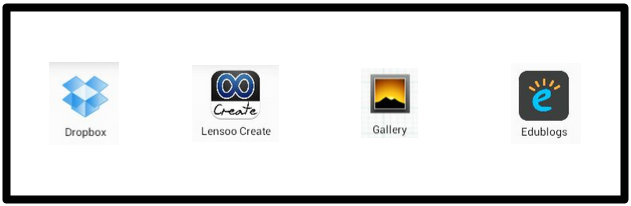 Steps on the LearnPad 1) Open the Lensoo app and click create new recording. 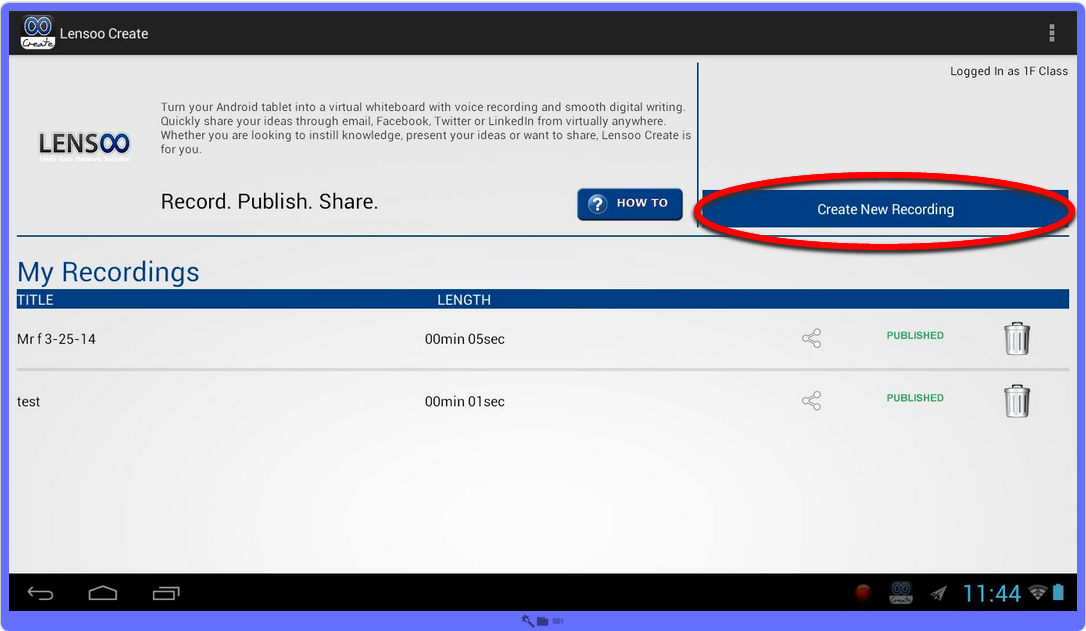 2) Click on the landscape icon to insert images from Dropbox. 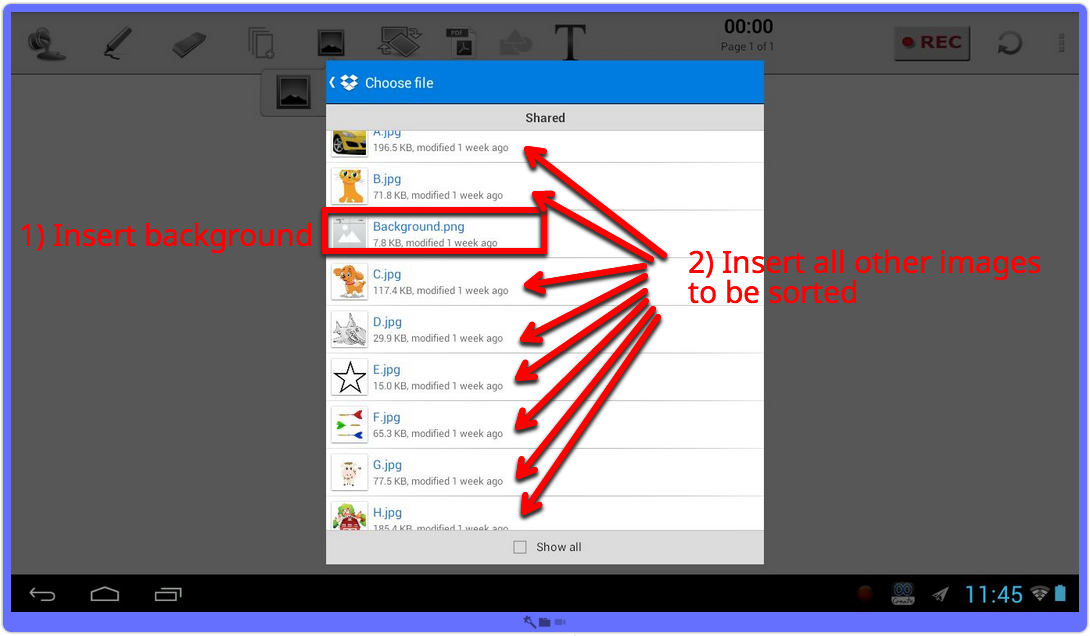 3) Sort pictures and then take a screenshot. 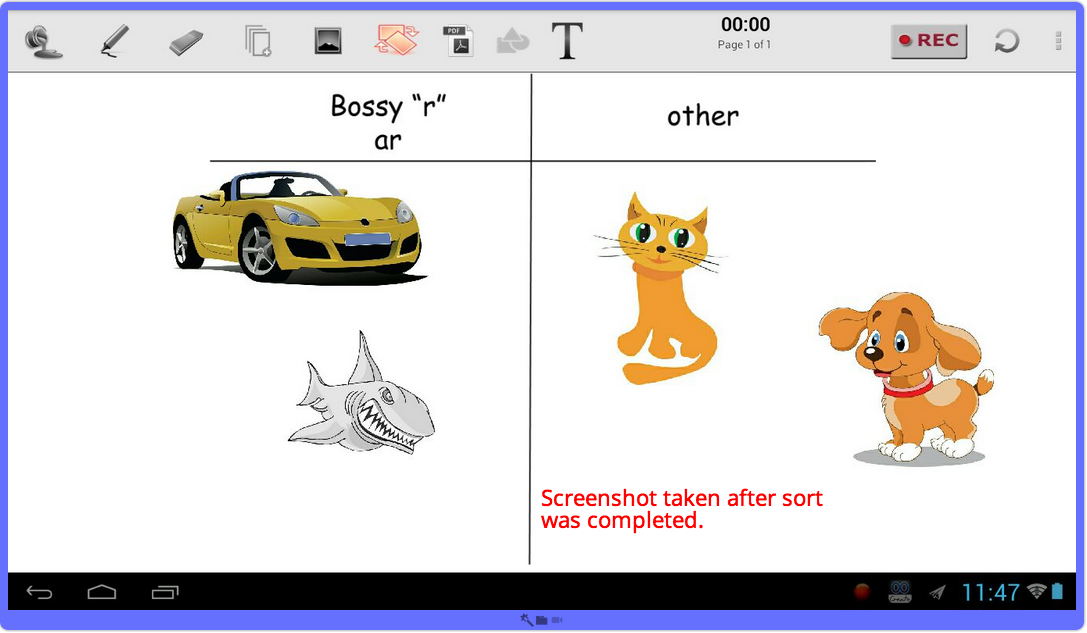 4) Access your screenshot from the Gallery. 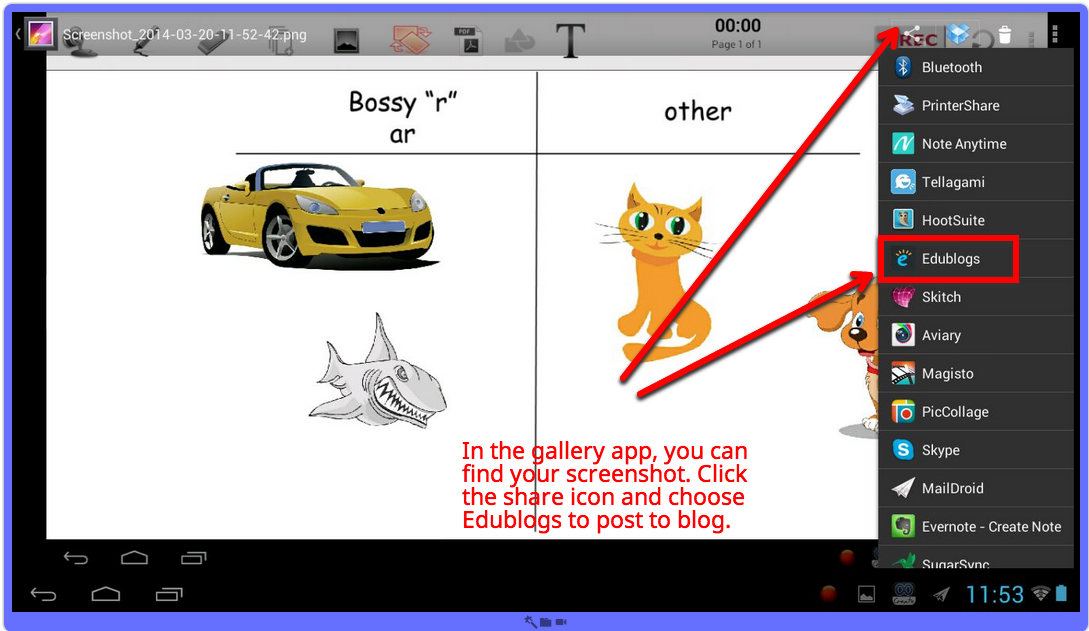 5) Share image to Edublog. 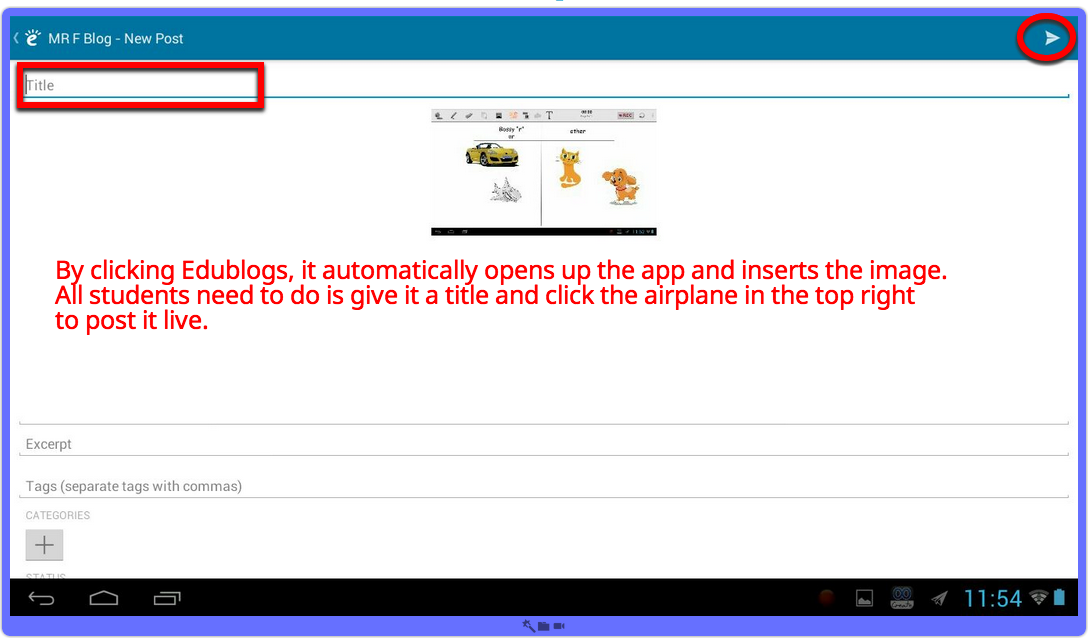 Student Sample of completed sort 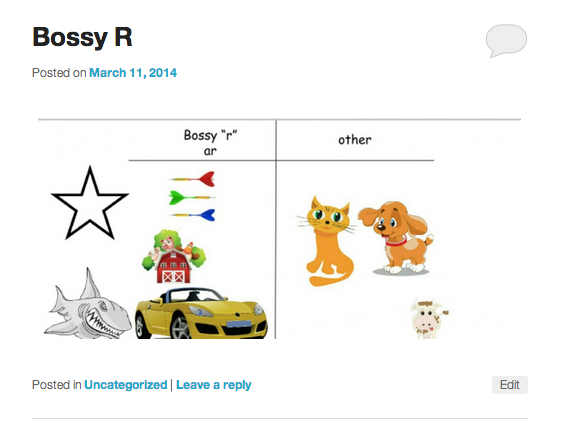 iPad: Bossy "R" Sorting The backend work for setting up images would be identical on the iPad. The big differences would be the apps used for this activity. Below are the apps that would be used on the iPad. *You could use Edublogs as the blog platform as well. My students are familiar with Kidblog on the iPad so we would have used Kidblog to post. 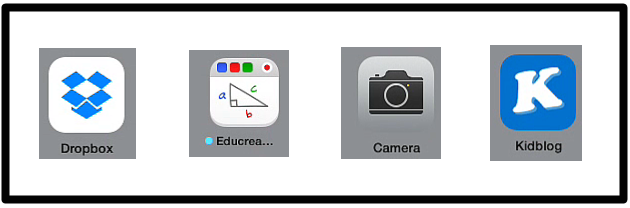 Steps on the iPad 1) Open up the Educreations app and click New Lesson. 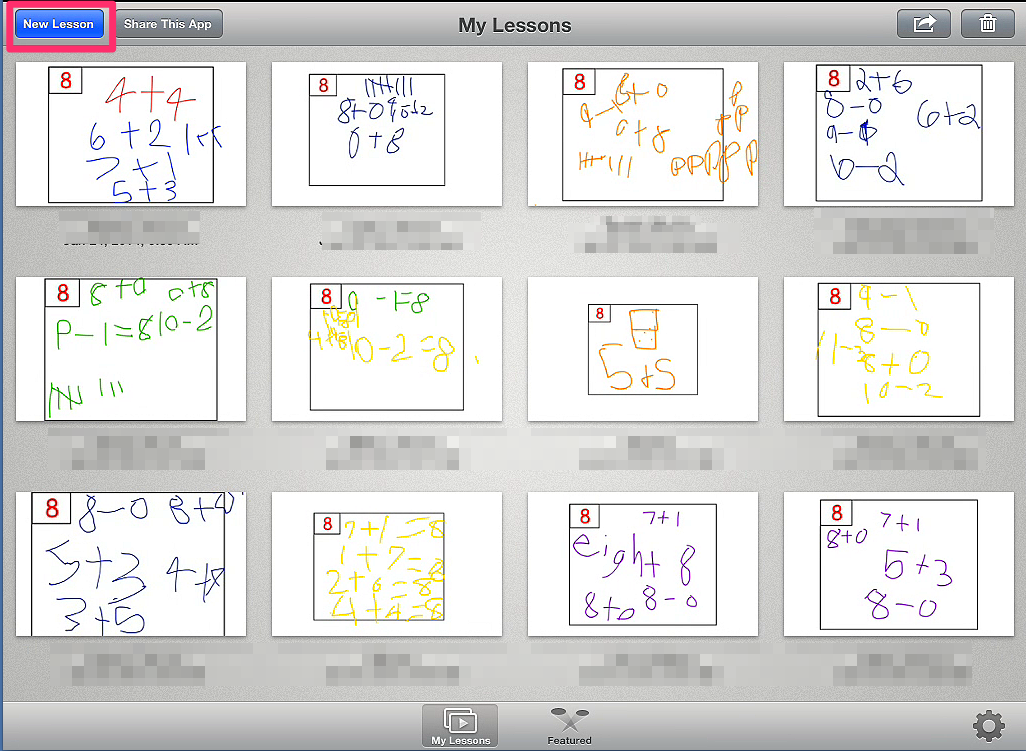 2) Click the landscape icon to access Dropbox. Insert background first then all other images. 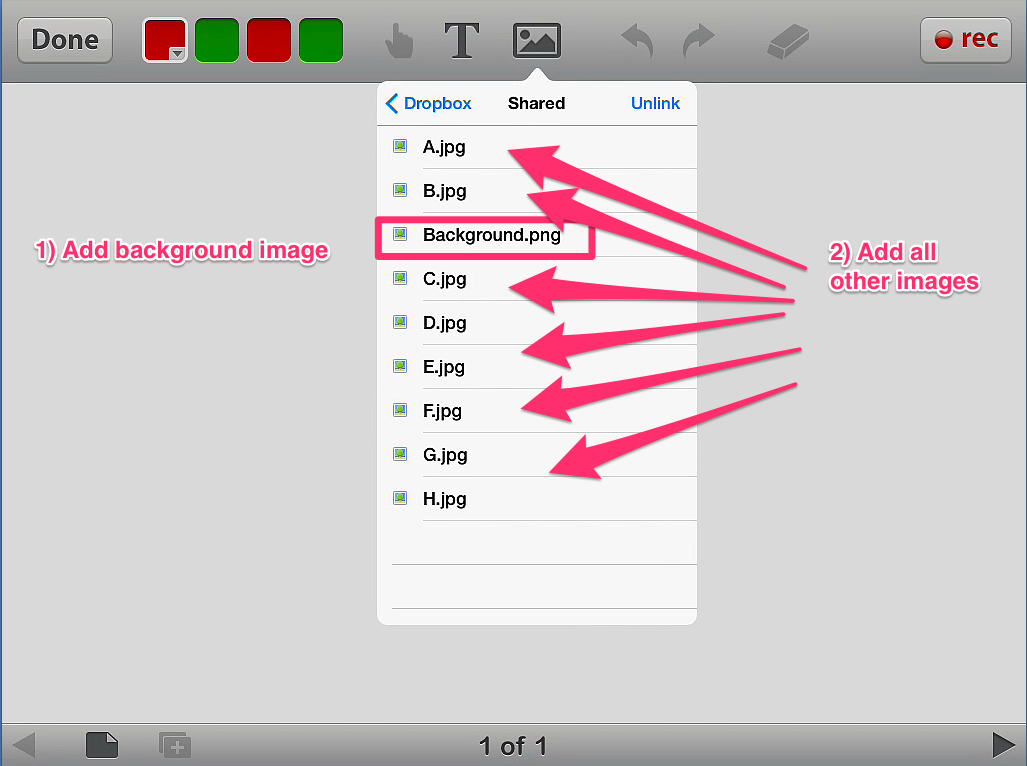 3) After images are sorted capture a screen shot. 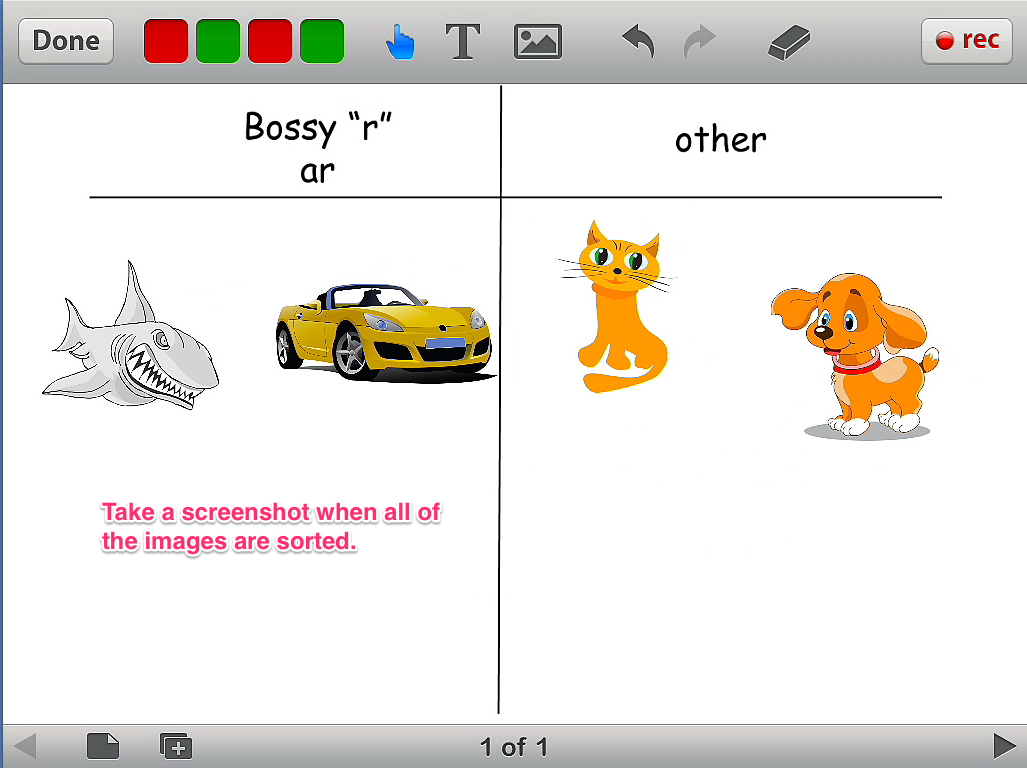 4) Open the Kidblog app, New Post, add photo from Library. 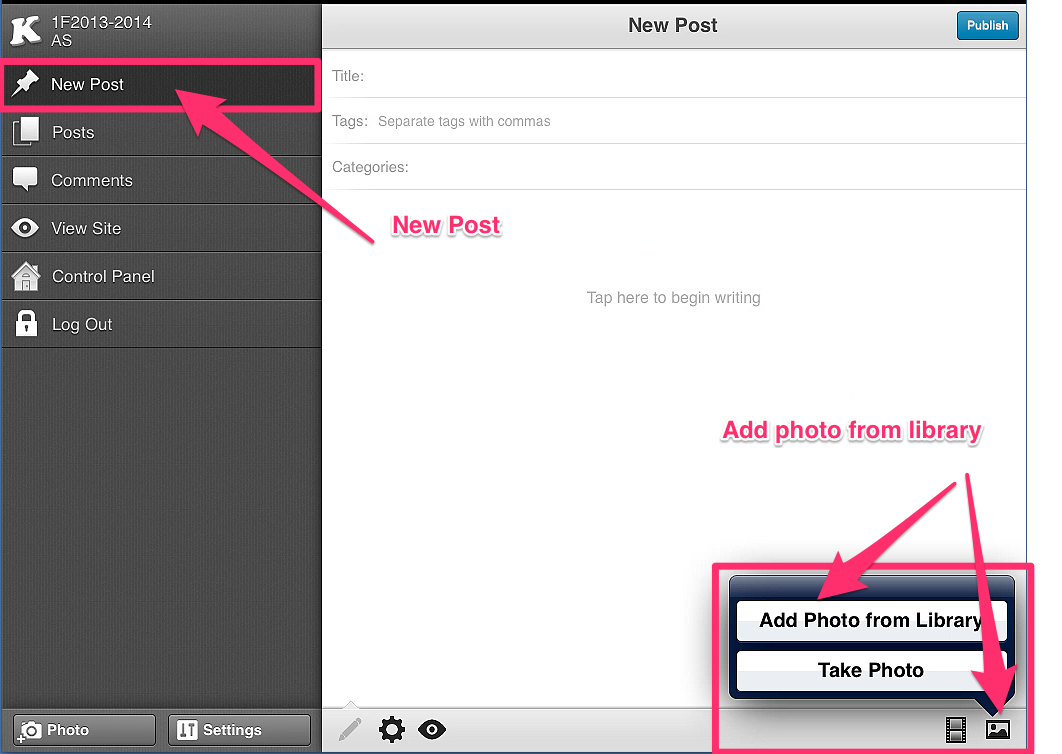 5) Add a title and click Publish to make it live. 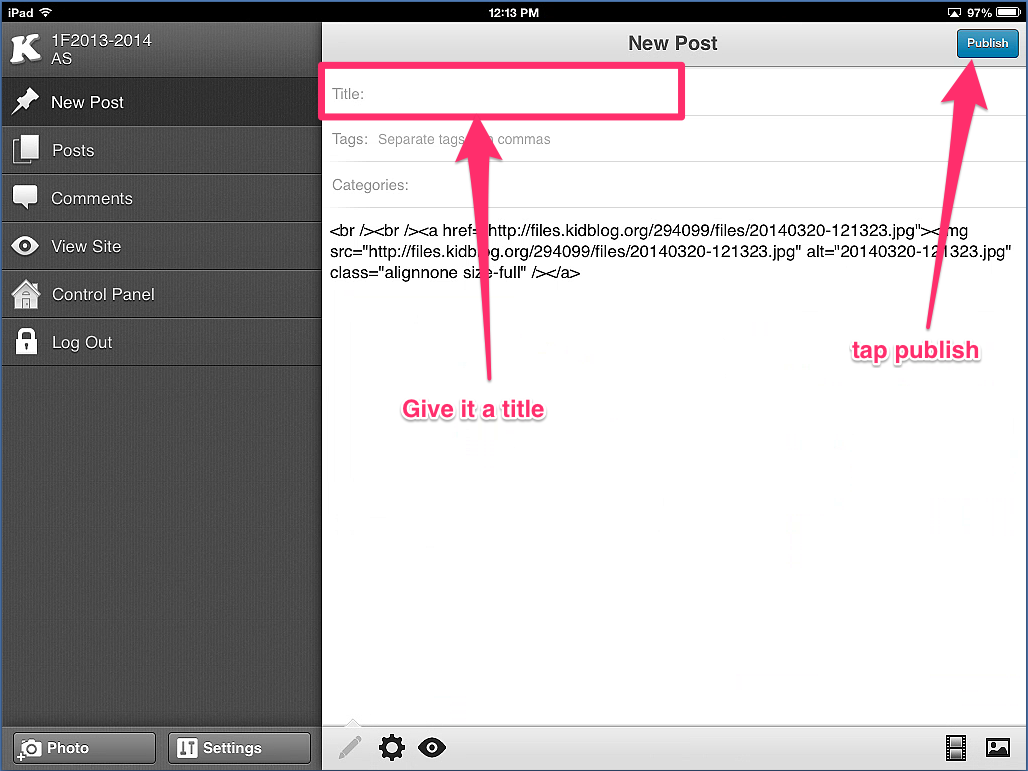 Share This:
**If you are unfamiliar with this project, check out my first post introducing my pilot project with LearnPads and comparing them to iPads. I had previously posted about using QR Codes with the LearnPad for my students to collaboratively build compound words. While we continued to work on our understanding of compound words, my students used the LearnPads to show their understanding of building compound words independently. To do this, students used the following three apps: 1) Lensoo Create 2) Dropbox 3) Edublogs Lensoo Create This app was used as a white board for students to manipulate pictures and annotate the names of each picture. Dropbox This app allowed us a simple method of sharing images to the devices which in turn made it possible for students to insert images into the Lensoo Create app. Once images were inserted, they were able to manipulate and write to create their compound words. Edublogs When students had finished moving their images around and labeling them to show compound words, they would take a screen shot, open up their Edublogs app and create a new post. They would insert their screenshot and publish their post. Video Tutorial of process on LearnPad & IPAdStudent Samples of final product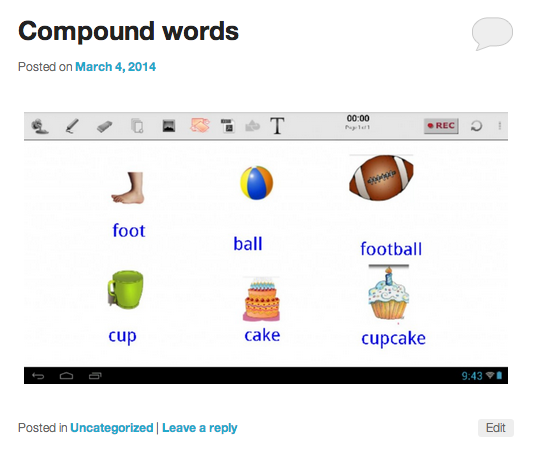 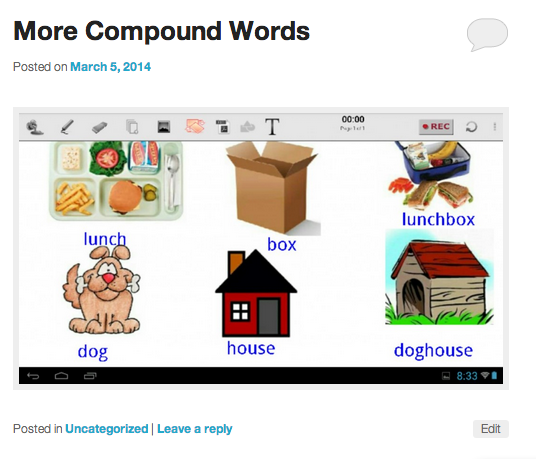 Share This:
**If you are unfamiliar with this project, check out my first post introducing my pilot project with LearnPads and comparing them to iPads. 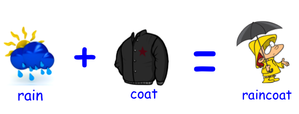 My first graders are spending this week learning about compound words. We began by watching the Compound Word Boogie. After this short video and gaining a better understanding of combining two words together to make one, we moved onto collaboratively practicing compound words. To summarize this activity, we used QR codes to practice building compound words. Students would scan a QR code. Upon scanning, a word would be revealed. After having the word displayed on their tablet, they had to search around the room for other classmates that had the other parts to their compound words. For example, if student one had rain, student two had coat and student three had raincoat, they had to find each other to build their compound word. Check out some of the steps below for this process. QR Codes
I began by creating a new blog post for each of the words as well as their compound word. You can see the sample above. After creating a post for each word, I then took that URL and created a QR Code using QR Code Generator. These QR Codes were then saved into a Google Doc for future reference. See examples below for turning URL into QR Code and saving to Google Doc. 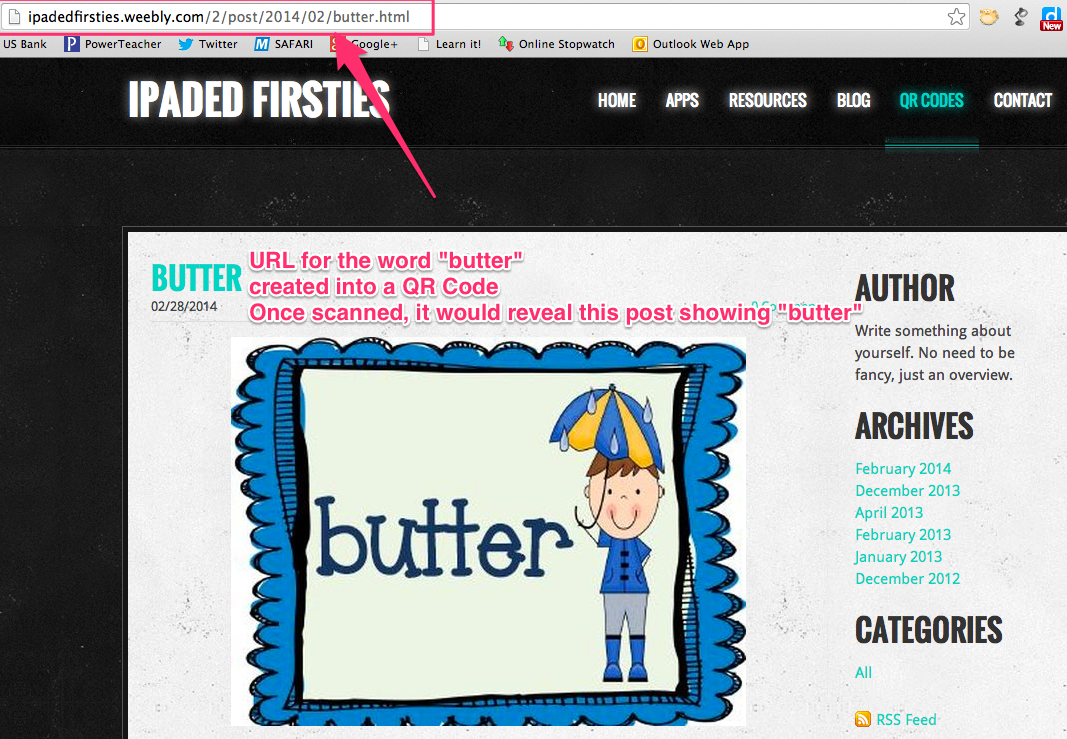 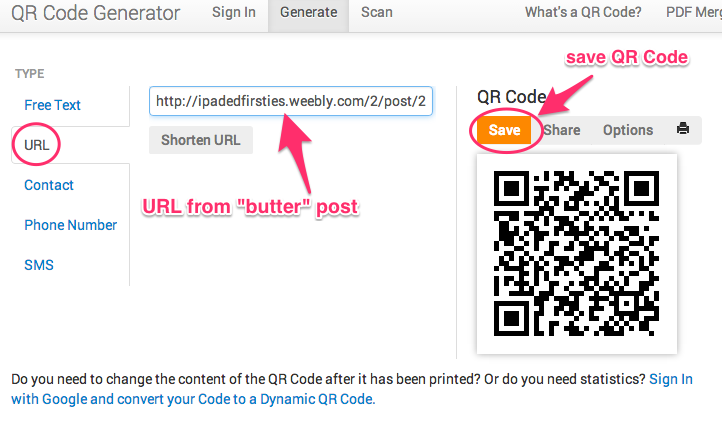 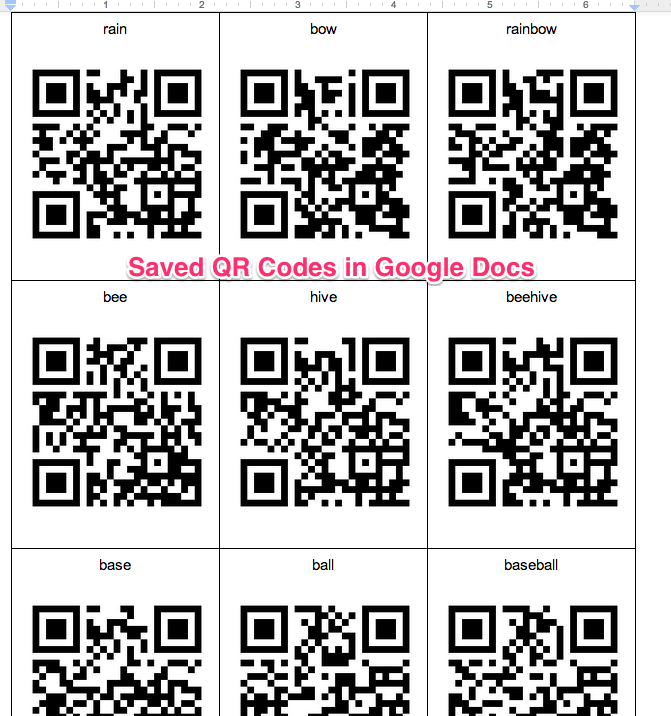 Building Compound Words After I had created a QR code for all the words that I wanted to use, I then printed them out and gave one to each student. Students scanned their QR Code to reveal their word. When everyone had a picture on their LearnPad, I said, "Go!" and the collaboration began to build compound words. Once everyone had found their group, we read through them as a class. Students returned to their seats, passed their QR Code to their neighbor and the process was repeated again. While we did this activity on the LearnPad, the same thing could be done on the iPad as well. For the iPad, we would have used the app called Qrafter to scan the codes. Regardless of using the LearnPad or iPad, both devices would allow you to complete this activity the exact same. With this being said, I would give a tie to building compound words on the LearnPad and iPad. Check out the video below to see our activity in action Share This:
**If you are unfamiliar with this project, check out my first post introducing my pilot project with LearnPads and comparing them to iPads. In first grade we have been learning about attribute rules with 2-D shapes. We began our lesson exploring and reviewing different 2-D shapes. We practiced identifying the different attributes of each shape. After a quick review, we began working together to sort shapes based on an attribute rule (all red shapes, all squares, only triangles, etc.). This led to having shapes already sorted and working to identify the "mystery" attribute rule. This is where the LearnPad/iPad got integrated into the lesson. In an attempt to have my students apply their learning while creating and collaborating, we sorted shapes on our tablets. After sorting these shapes into two categories, students wrote "rule" above the side with their "mystery" rule. This final product was posted to their blog. After posting to the blog, students were able to leave comments with their guesses about the attribute rule being represented by the posted image. This was helping us work towards CCSS 1.G.A "Reason with shapes and their attributes." Below is a video that highlights how this activity was done in my class as well as how it can be done on both LearnPads and iPads. Below are some screenshots of a final product that was posted online. You can see the rest of the post by clicking here. 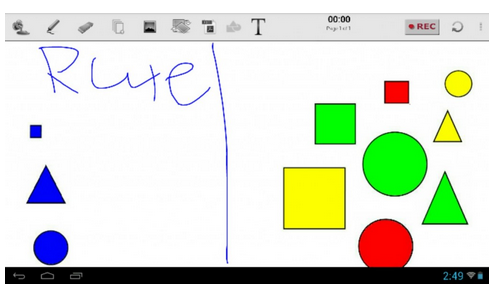 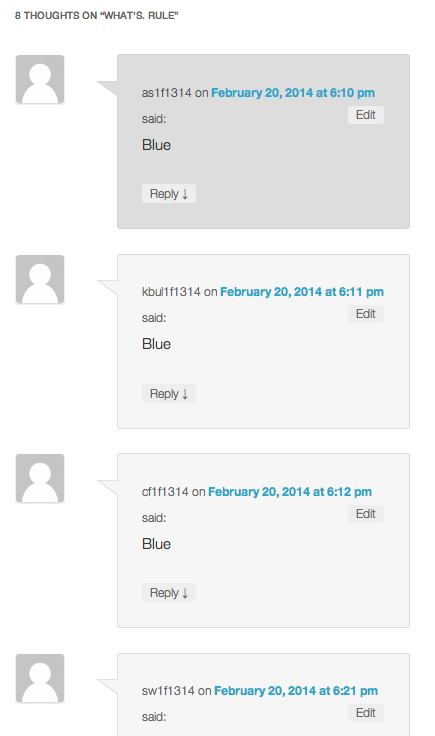 Share This: |
Andrew FenstermakerInstructional Technology Coordinator | Innovation Coach | Google Certified Innovator | Presenter | Blogger | Adjunct @UiowaEducation | Owner @kids_f_i_r_s_t 


|


 RSS Feed
