**If you are unfamiliar with this project, check out my first post introducing my pilot project with LearnPads and comparing them to iPads. My first graders have been working on writing dialogue. This can be a tricky task for any grade level. Figuring out where to put quotation marks, commas, periods, questions marks can be a nightmare. In an attempt to make this more relative to their lives as well as integrate our tablets, we utilized a couple apps to create short videos showcasing dialogue. I will outline the process for both the LearnPad and iPad below, as well as add a video explanation at the end of this post. In a nutshell, students used a paper template to record a question they would ask mom or dad as well as their mom or dad's response. After having their paper script, they used the Tellagami app to create their avatars and record their paper scripts. After creating their two Tellagami videos, they used a video editing app to mash both video clips together. Their merged video clips were then posted to their blogs to showcase their understanding of dialogue when writing. LearnPad: Dialogue Writing Steps Students began by writing out their scripts using a paper template. You can see it below and download it for yourself here. 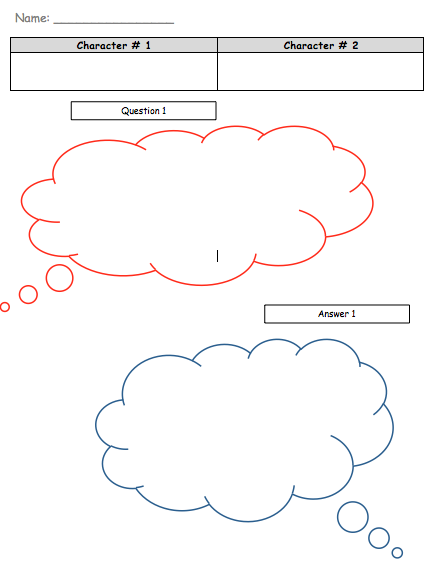 After completing their paper script, they opened up the Tellagami App. This app allows you to create an avatar. After you have created your avatar you are able to record up to a 30 second message which your avatar will speak when all done. 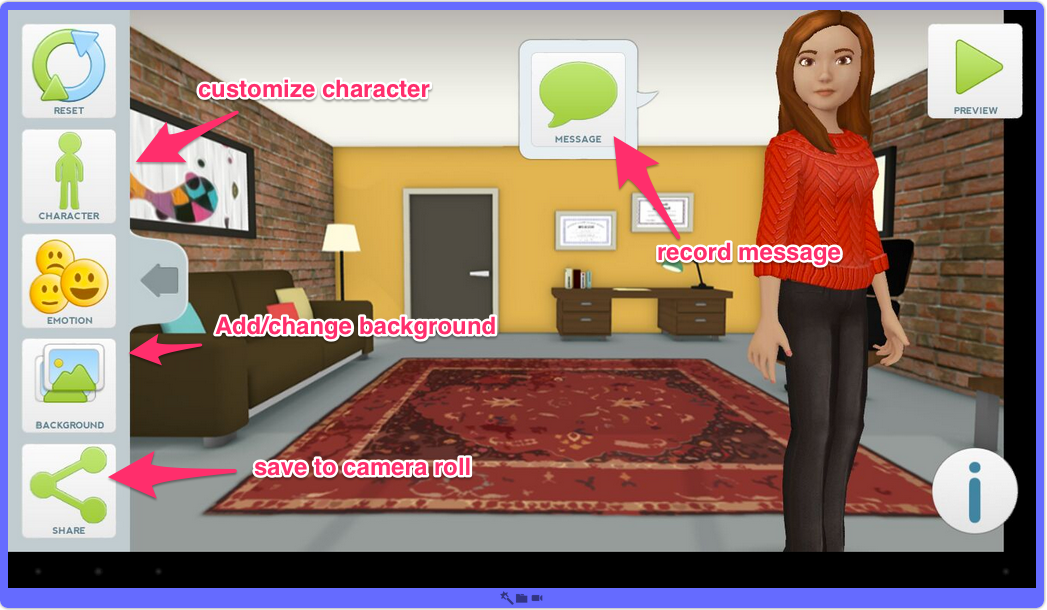 After recording a message for both of their characters (themselves and mom or dad), they opened up the Movie Studio Video Maker app to merge both of their video clips into one final movie. 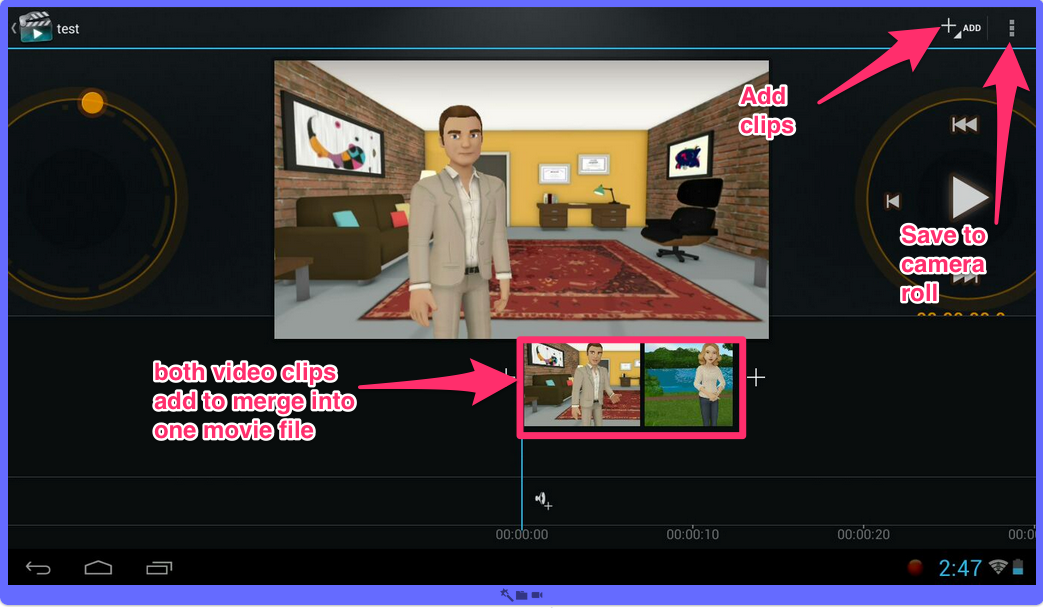 Once they had both video clips merged into one movie, they then opened up Edublogs to post their video and share their understanding with dialogue. Below is a sample that a student created. **Within the video editing app, you can trim your videos. We could have trimmed the Tellagami brand at the end of each video. However, with this being our first experience with the video editing app, we chose to keep the steps simple. iPad: Dialogue Writing Steps The steps on the iPad would be identical up until video editing. Students would have started with their paper scripts. Once their paper scripts were done, they would then open the Tellagami app, customize their avatars, record their message and save to the camera roll. When they got to the video editing, they would open up the Perfect Video app. Once opened, they would create a new project. Once in their new project, they would be able to add in their two video clips. 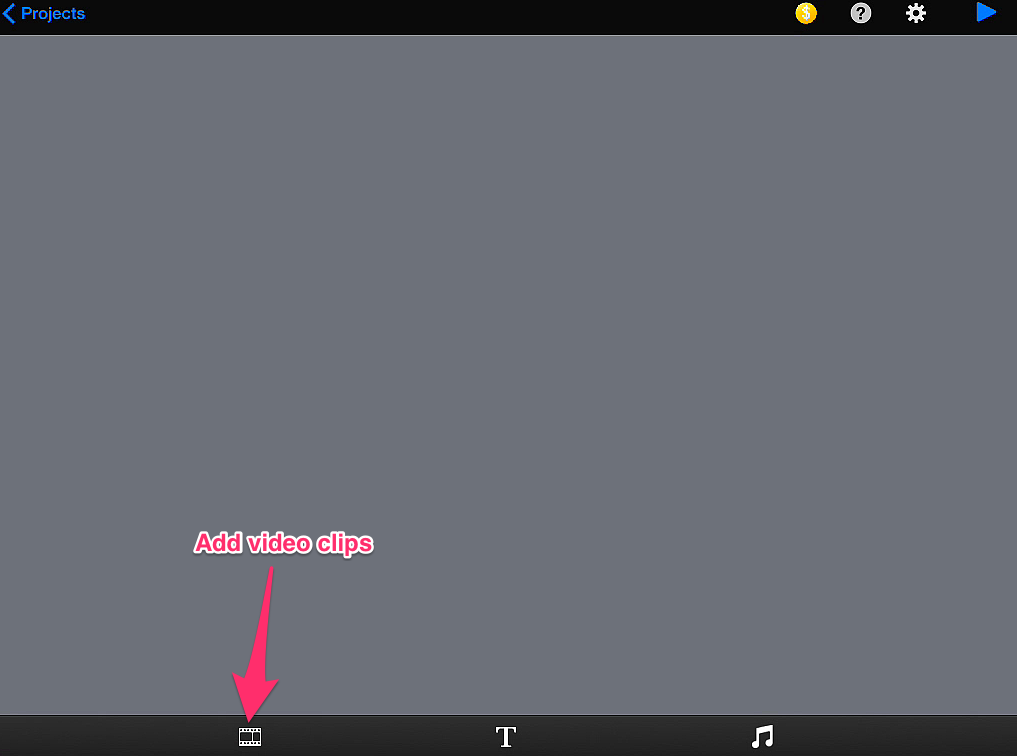 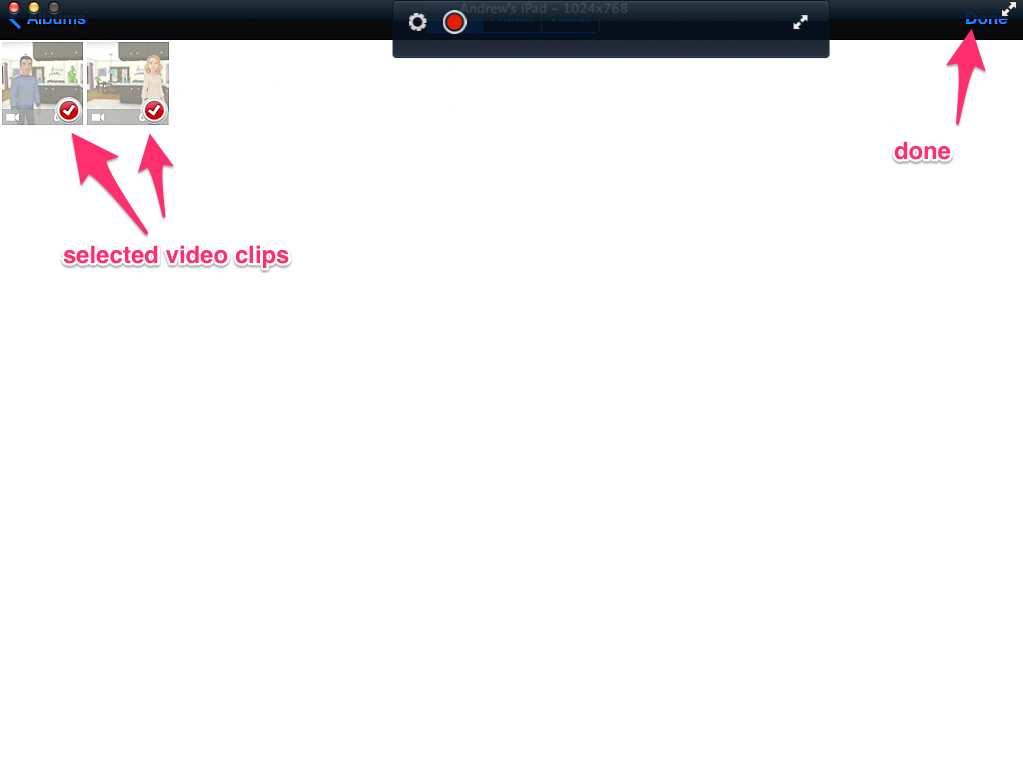 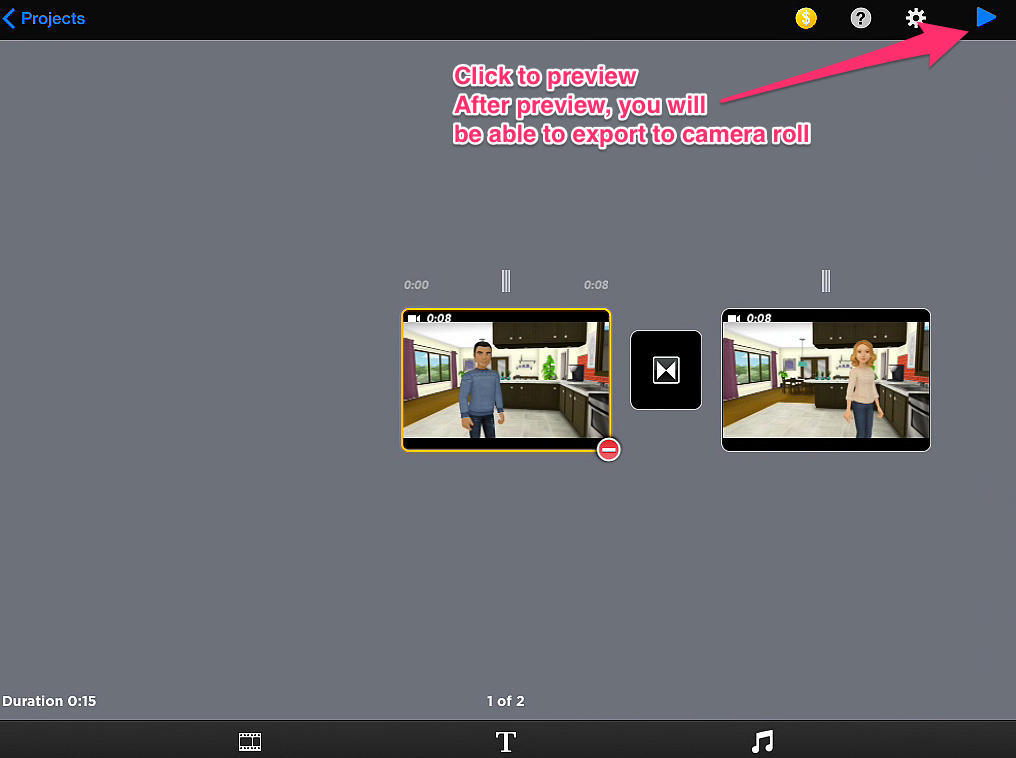 After they had merged their video clips into one movie file and exported it to their camera roll, they would then open up their Kidblog app. Once in the Kidblog app, they would create a new post, add their movie file from the camera roll and publish their post to share their understanding of dialogue. Video Comparison of processShare This:
0 Comments
Your comment will be posted after it is approved.
Leave a Reply. |
Andrew FenstermakerInstructional Technology Coordinator | Innovation Coach | Google Certified Innovator | Presenter | Blogger | Adjunct @UiowaEducation | Owner @kids_f_i_r_s_t 


|

 RSS Feed
