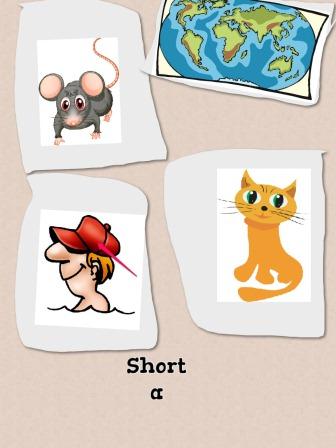
 As my 1st graders continue to learn about short vowel sounds, I try to find different ways to enrich their learning experience using the 5 iPads that we have in our classroom. We have talked about the short "a" and "i" sounds so far this year. In our previous exploration of building words, we used the Educreations app and picture cards to build words. Read about it here. Our goal with our new activity was to hone the skill of differentiating between the sound represented by the short "a" and the sound represented by the short "i." Furthermore, I wanted them to practice their collaboration skills by working in small groups to sort pictures. There is some initial prep, but the kids loved this activity. I created a screen cast about this process which may help clarify some of the steps that are listed below the video. Step 1: finding pictures with short "a" and "i" The first job I had was locating numerous images that could be used to represent the short vowel sounds of "a" and "i." Luckily for my district, we have access to iClipart for Schools. If you do not have access to clip art, check out my clip art resource page to find resources for finding royalty free clip art. Step 2: Saving pictures to the cloud After you have found the pictures you want to use, you can save the to a cloud service such as Google Drive, Dropbox, SkyDrive, Box, etc. I used Google Drive for this step. There are a couple reasons I saved it to the cloud: 1) I can reuse this or tweak it year after year instead of reinventing it each time, 2) I can get a URL for my image stored in the cloud. Step 3: Create QR Codes Now that you have your images saved to the cloud, you can obtain the URL for your image. In Google Drive, you can choose to share your image and change the option to "anyone who has the link can view." By doing this, you are given a link for your shared image. If you are not familiar with QR Codes, check out Common Crafts explanation. You can use any QR Code generator you would like to create QR Codes for your images. I used QR Code Generator which I have as an app in Chrome. I copied the link of each image, and created a QR Code for each image. Step 4: Save QR Codes As you are creating a QR code for each of your images, it is a good idea to save them into a document or spreed sheet. Since I was using Google Drive to store my images, I just created a Google doc to house the QR codes for this activity. I inserted a table and began adding my QR codes. This allows me to have them for future reference as well as label them so I know what the QR code represents without having to scan it. Step 5: Print, Cut and hang QR Codes Once you have all your QR codes created and saved, you can print them out. I printed out two copies. One that I could cut up and then one that I could keep as a master while students were doing the activity. While I was cutting, I put a "1" on the first QR code that was to get hung up and then put a "1" on my master copy. *Remember the master has a caption telling what each QR Code is without scanning it. However, I don't want my students to see what the QR Code is unless they scan so I just put a "1" on it so I could compare it to the master. This was repeated for all of the QR Codes as I hung them around the class. I had a total of 12 QR Codes hanging around. STep 6: Groups, Pic Collage and have fun! The final step is to put your students into small groups. Also, if your kids haven't used the Pic Collage app, it would be good to go over it first. Basically, the Pic Collage app lets you insert multiple pictures onto one "poster." You can resize, crop, rotate, layer and much more with your images. In addition you can add text to your "poster."
Each group chose either short "a" to "hunt" for first or the short "i." They set out scanning QR Codes using the Qrafter app. Once the QR code was scanned, the correlating image would be displayed on the iPad. If it matched the short vowel their group was "hunting" for then they would screen shot the image (home/power button simultaneously). After the students found all the corresponding pictures for their chosen short vowel, they opened up the Pic Collage app. Once inside the pic collage app, students were able to create a new poster. One option is to add images from the camera roll (this is where all their screen shots saved). After they loaded all their images from the camera roll, they could add text telling what the pictures represented and move onto the next short vowel hunt.
0 Comments
Your comment will be posted after it is approved.
Leave a Reply. |
Andrew FenstermakerInstructional Technology Coordinator | Innovation Coach | Google Certified Innovator | Presenter | Blogger | Adjunct @UiowaEducation | Owner @kids_f_i_r_s_t 


|
 RSS Feed
