**If you are unfamiliar with this project, check out my first post introducing my pilot project with LearnPads and comparing them to iPads. When learning to read in first grade, we spend time learning about the bossy "r" or "r" controlled vowels. To utilize our tablets and provide practice, we completed a sorting activity with bossy "r" combinations. The goal of this activity was for students to demonstrate their understanding of bossy "ar" combinations by sorting pictures based on having the bossy "ar" sound or not. Students would insert a background image into a sceencasting app. After the background image was inserted, students then inserted some pre-selected images. Once these images were inserted, students spent time sorting the pictures into a bossy "r" or "other" category. When all images were sorted, a screen shot was captured and in turn posted to their blog. The process is highlighted below for both the LearnPad and iPad. LearnPad: Bossy "R" Sorting I had to do some backend work prior to this activity so that the images were all accessible for students. You can download the images that I used by clicking here. We used the apps below to complete this sorting activity on the LearnPad.  Steps on the LearnPad 1) Open the Lensoo app and click create new recording. 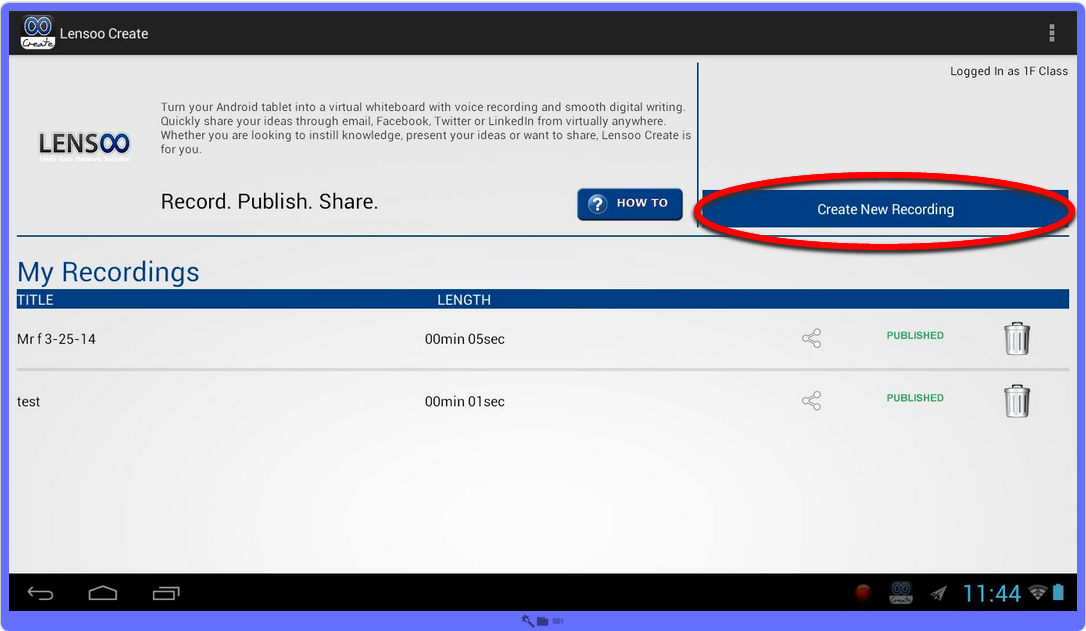 2) Click on the landscape icon to insert images from Dropbox. 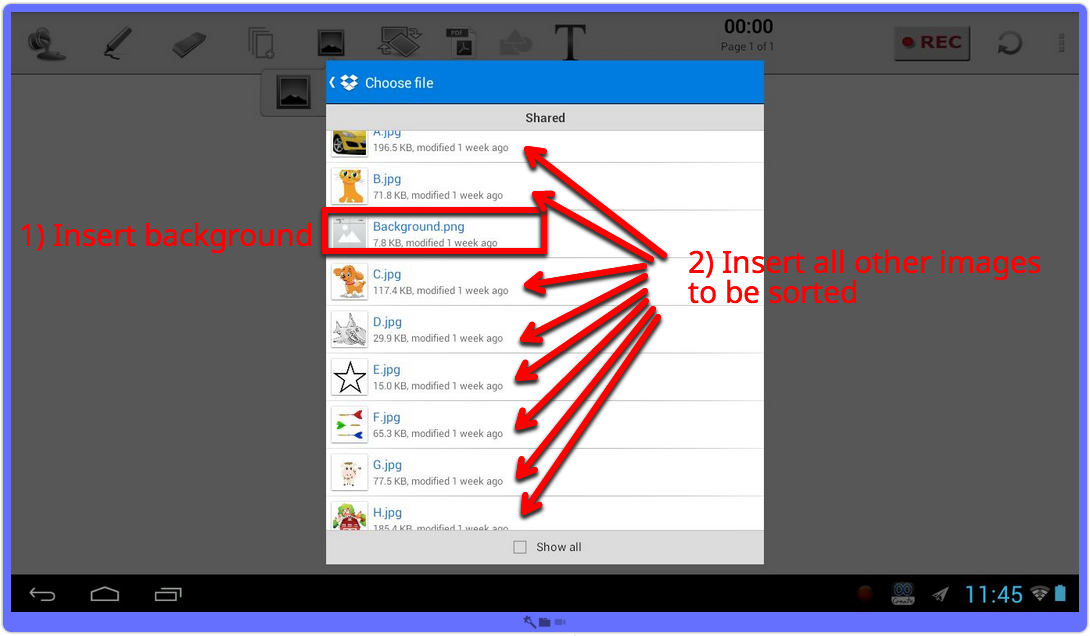 3) Sort pictures and then take a screenshot. 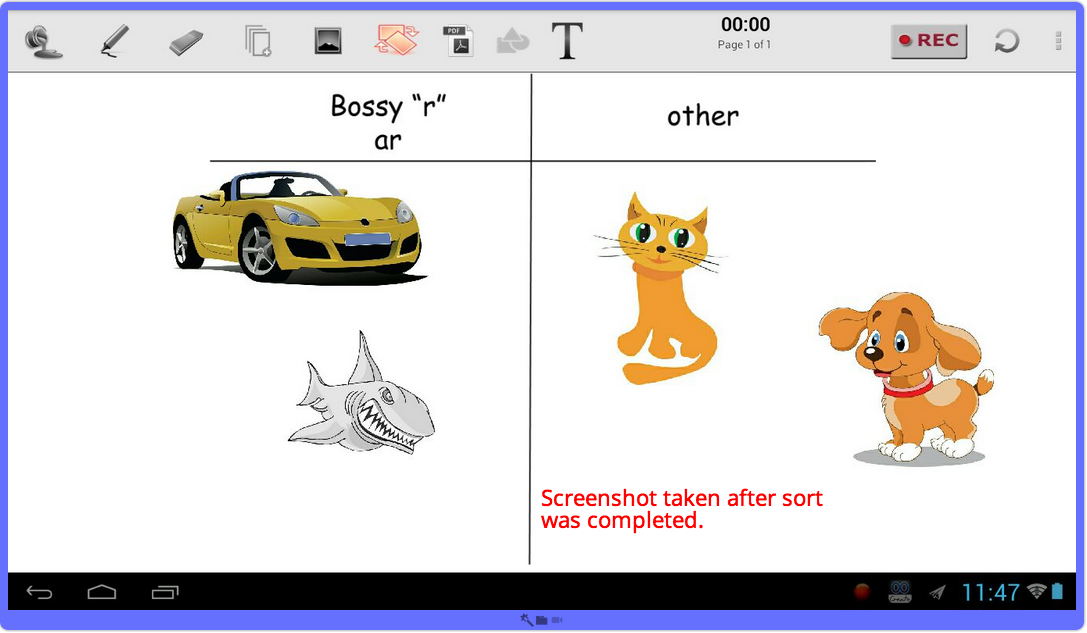 4) Access your screenshot from the Gallery. 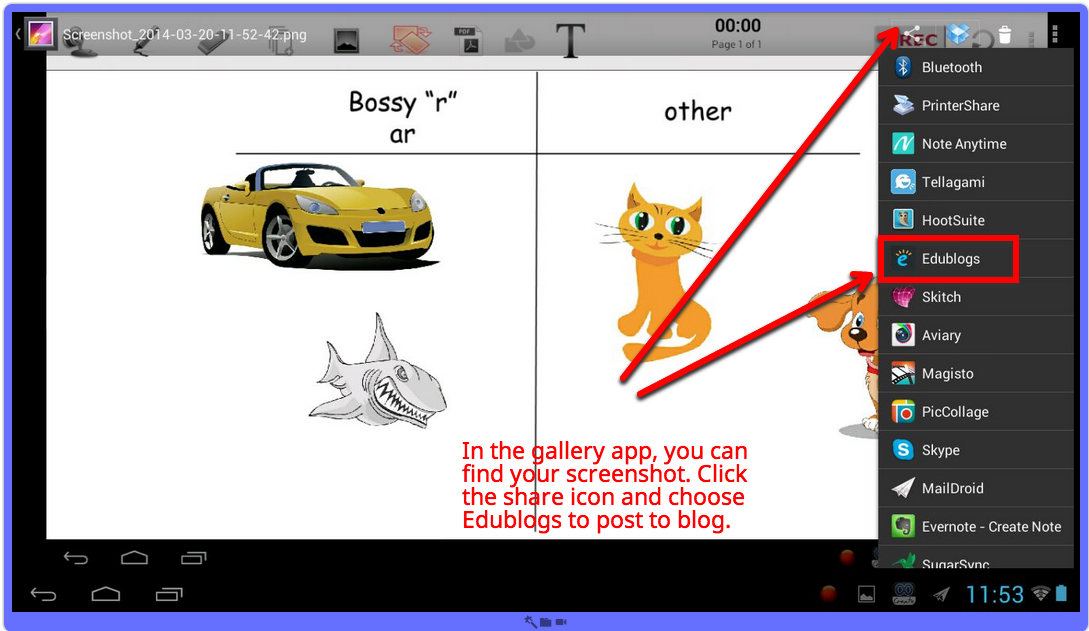 5) Share image to Edublog. 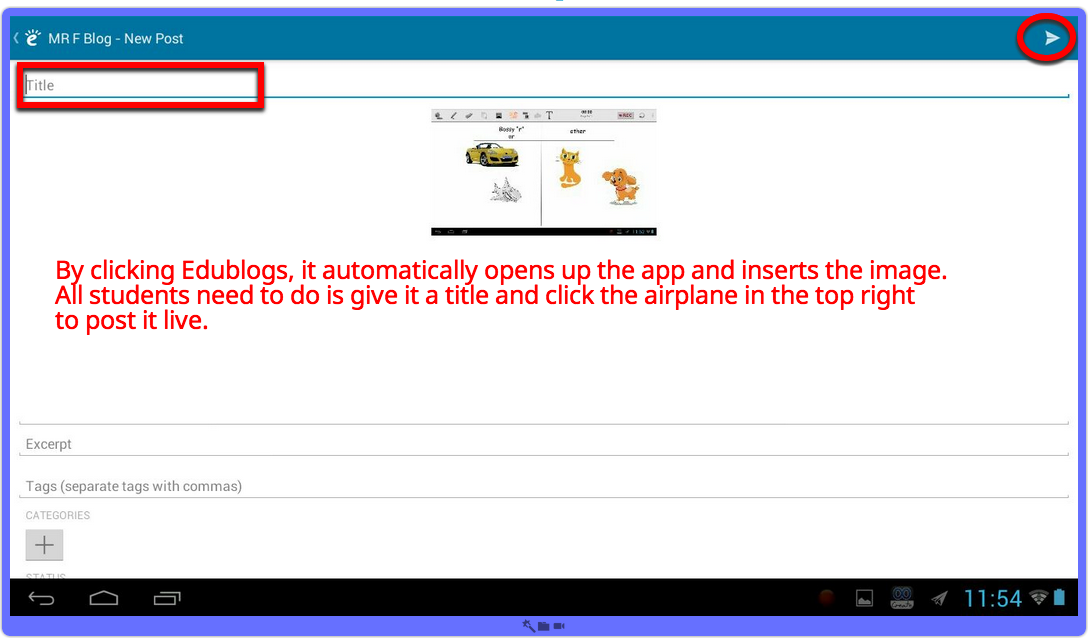 Student Sample of completed sort 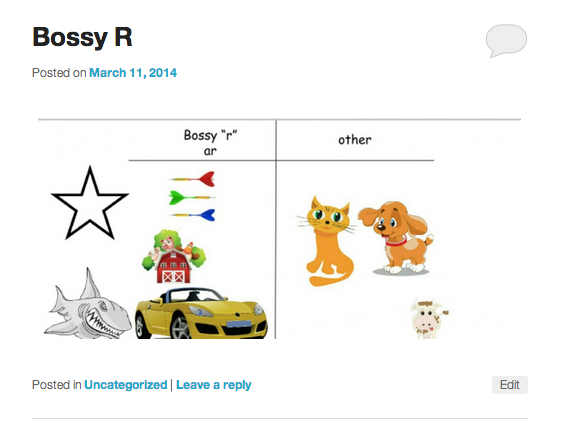 iPad: Bossy "R" Sorting The backend work for setting up images would be identical on the iPad. The big differences would be the apps used for this activity. Below are the apps that would be used on the iPad. *You could use Edublogs as the blog platform as well. My students are familiar with Kidblog on the iPad so we would have used Kidblog to post. 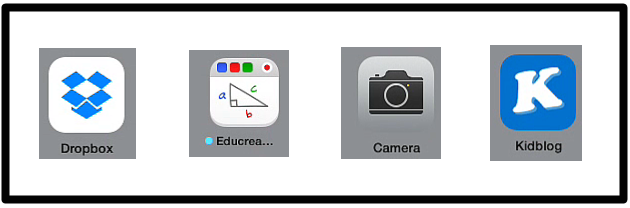 Steps on the iPad 1) Open up the Educreations app and click New Lesson. 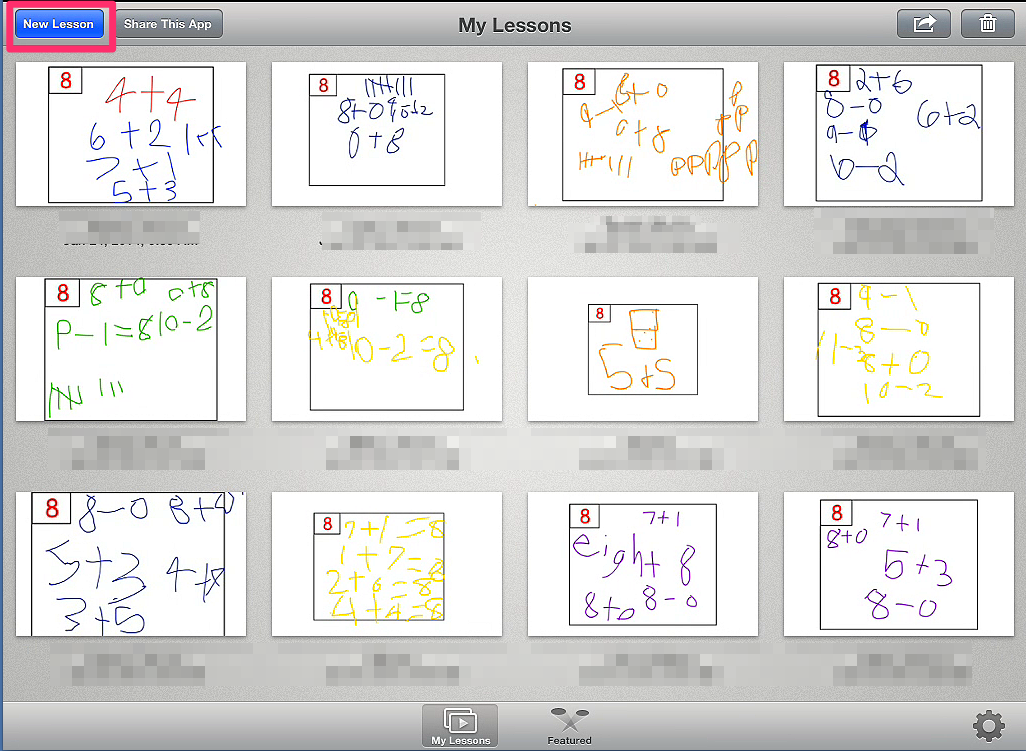 2) Click the landscape icon to access Dropbox. Insert background first then all other images. 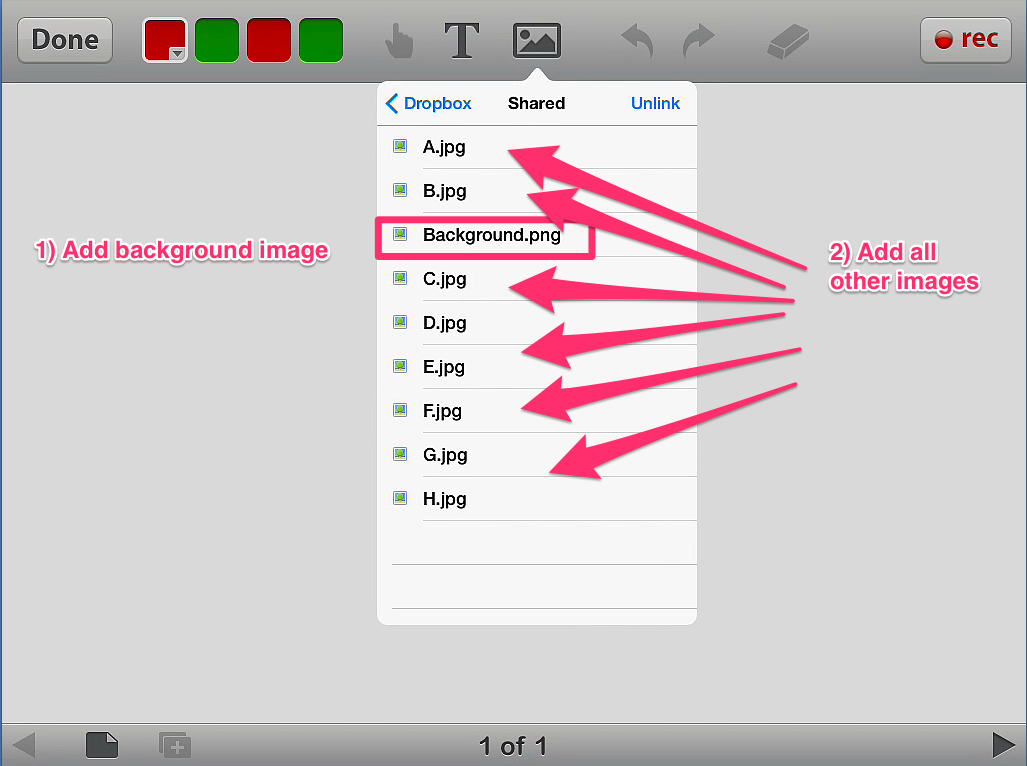 3) After images are sorted capture a screen shot. 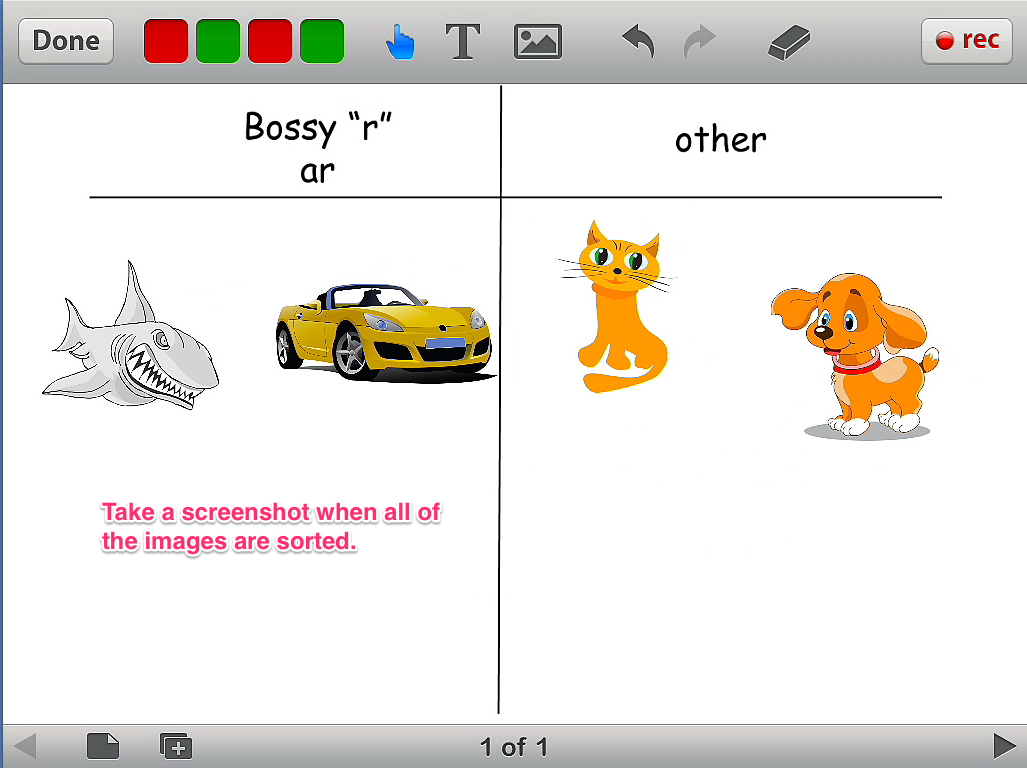 4) Open the Kidblog app, New Post, add photo from Library. 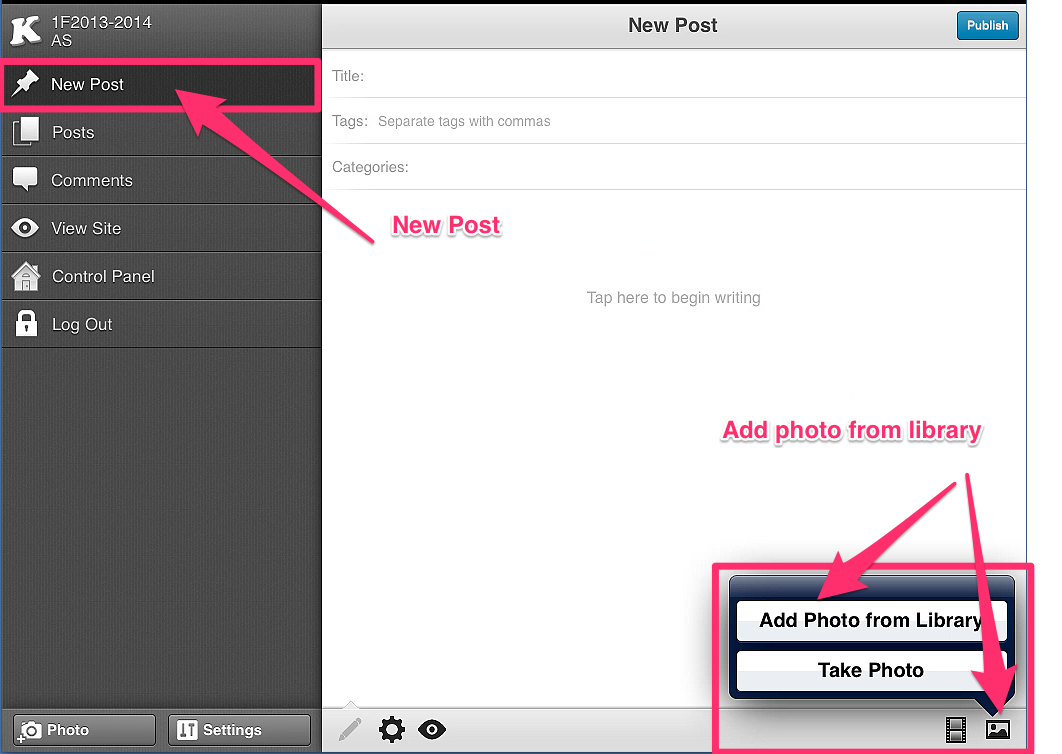 5) Add a title and click Publish to make it live. 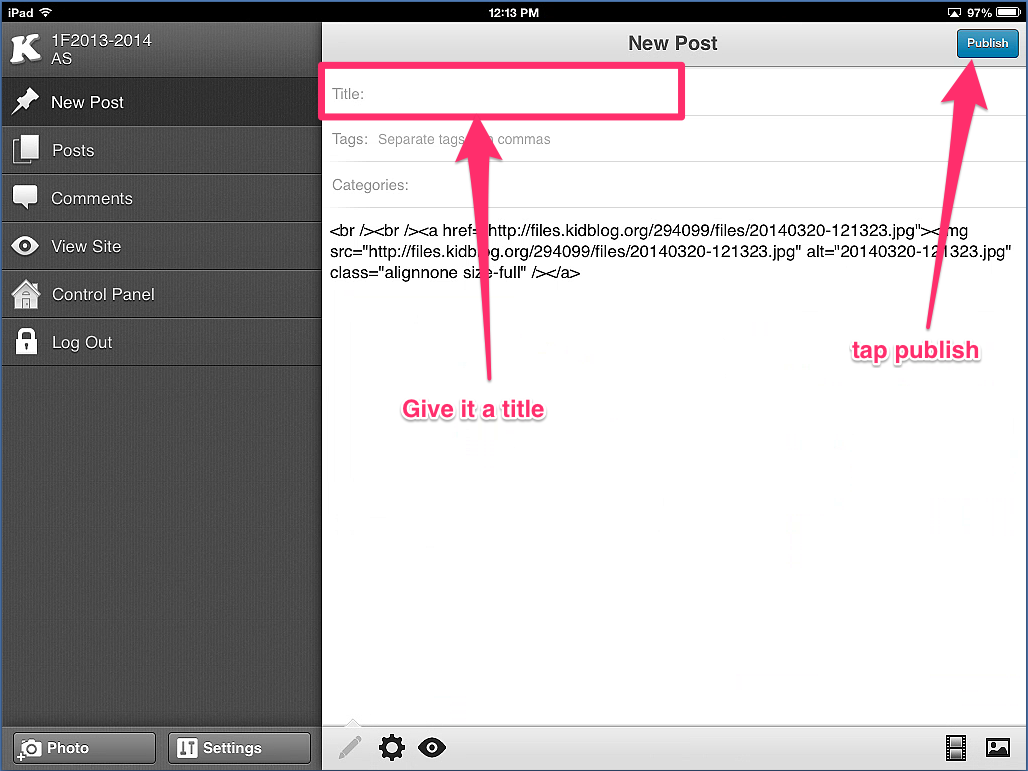 Share This:
0 Comments
Your comment will be posted after it is approved.
Leave a Reply. |
Andrew FenstermakerInstructional Technology Coordinator | Innovation Coach | Google Certified Innovator | Presenter | Blogger | Adjunct @UiowaEducation | Owner @kids_f_i_r_s_t 


|


 RSS Feed
