 **If you are unfamiliar with this project, check out my first post introducing my pilot project with LearnPads and comparing them to iPads. I have been comparing both the LearnPad and iPad as options for tablets in the classroom. Typically I showcase an app/resource and how it functions on both devices. After comparing, I give my two cents on which one I prefer. For this post, I will only be talking about the iPad and an option for going paperless in the classroom. Check out the video below for an explanation. Check out the LearnPad's options for a paperless classroom here.  PDF Expert is the app that provides a great option for going paperless with iPads. It does have a big price tag at $9.99 but it is well worth the investment. One of the nice features about this app is the amount of options you have for syncing with cloud storage. This should be able to accommodate the variety of cloud storage services that schools use. Below is a screen shot of some of the options for cloud storage. 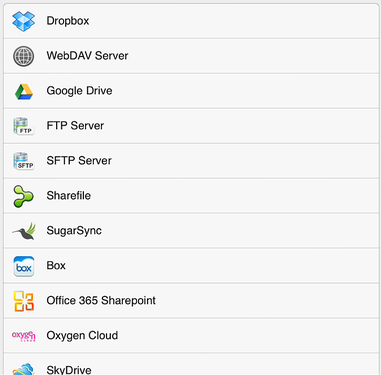 One of the steps to begin this process is to sync a folder within the PDF Expert app itself. To do this, you must first ad your cloud based network. Your network then appears under "favorite networks." 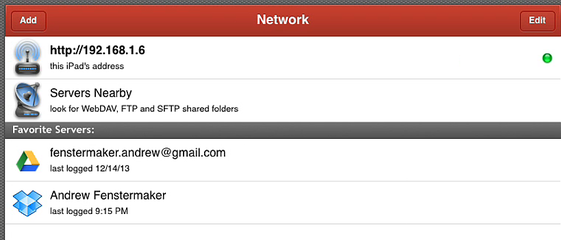 Open up your favorite network and locate the folder you would like to sync within the PDF Expert app. Once you have opened the folder you wish to sync, click the "sync" button in the top right. 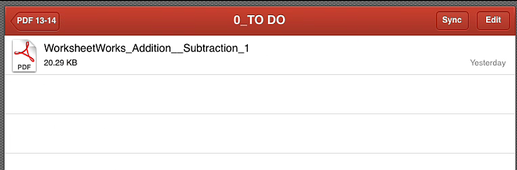 Once you have done this, you will need to repeat the process for each student iPad. This would also need to be done on your "teacher" iPad so you could access their files and annotate feedback for them. *Note--when a student would make annotations, it will sync with the cloud. So you can view their annotations via the cloud service from your computer. So you don't necessarily need a "teacher" PDF Expert option unless you want to annotate feedback. Students will need to make sure that they open up "assignments" from the documents folder within the app. If they use the network tab, it will create duplicate copies of files which eats up cloud storage space.  I really like this option for the fact of being able to provide feedback in the same file that a student completed. That student can then make corrections according to the feedback in the same file as well. Essentially you are only using one file instead of creating a duplicate every time changes are made. Share This:
1 Comment

What: I don't know about you but I get annoyed with file clutter on my computer, in the cloud and any other place that I keep files. Sometimes this is due to having multiple PDF files that all pertain to the same topic. Have you ever dreamed of magically making all those individual PDF files into one file? What about doing it for free? PDF Merge provides a web tool that can complete this process for you in a snap. 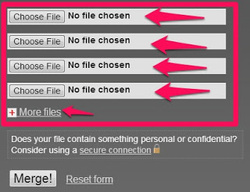 1) Select the files that you want to merge into one single file. If you do not have enough blanks click the red plus sign to add more files. 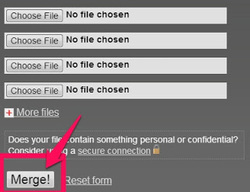 2) Once you have all the files you want to merge into one file, click the Merge! button and let PDF Merge do the rest. Techtastic Integration
As I had previously mentioned, file clutter can be obnoxious. If you are looking for a way to organize your PDF files, PDF Merge can help. What about students? If students are doing a collaborative project and need to combine their PDF resources, PDF Merge can serve as a tool to combine all their files. 
What: Ever get a giant PDF packet only to find out you just want to keep one page out of the packet? PDF Split is a free web tool that will solve this problem for you. It is super simple. Select the file you want to split, choose the pages you want to split out and choose split. 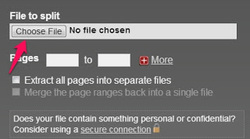 Step 1---Choose your file 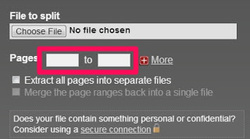 Step 2--Specify your pages 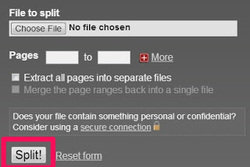 Step 3---Split your page or pages out into a new file Techtastic integration
If students find a resource for a project and need to extract a single page, they can use PDF Split to obtain the resource that they need. In addition, if the student needs to print out information from a PDF and only need one page, he/she can use PDF Split to save on printing out numerous unwanted pages. Teachers can use this resource to help separate files out of PDF files received from meetings. I have been using PDF Split to get pages out for my reading curriculum. I can download an entire unit's practice book pages into a single PDF file. However, there are times that I only want a couple pages to put into the SMART Notebook software. PDF Splits lets me extract only the pages I want. 
What: Bindle is a simple app ($1.99) that allows you to quickly create PDFs of your pictures. 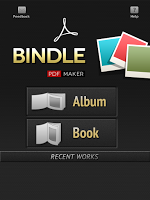 1) From the main screen choose to make a book or an album. 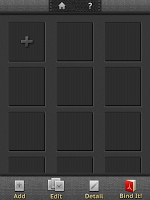 2) Click the plus sign to add pictures.  3) You can import images from your camera roll, take a photo as well as import from a few other sites like Facebook, Instagram, Flickr and Picasa. 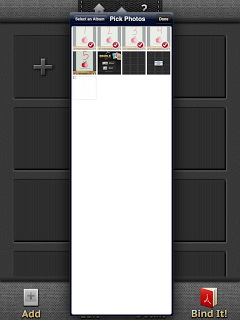 4) Once you have your selected images read to import, click done and let Bindle ad them to your grid. 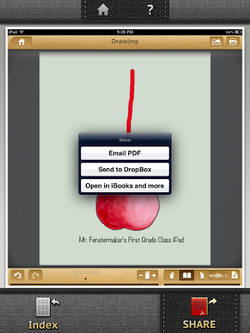 5) Once Bindle is done working its magic, you have the option to share it.
How to use..... We have been using this app as a simple tool for create digital e-books coupled with FlipSnack. FlipSnack turns your PDFs into flippable, digital books. Simply upload your PDF and let Flipsnack do the rest. Students could use this app to curate their learning. Send students on a scavenger hunt and use Bindle to catalog their learning. Use the app to snap some photos during PD sessions and turn into PDFs for later reference. |
Andrew FenstermakerInstructional Technology Coordinator | Innovation Coach | Google Certified Innovator | Presenter | Blogger | Adjunct @UiowaEducation | Owner @kids_f_i_r_s_t 


|
 RSS Feed
