Seesaw Recording
Seesaw is a great resource for amplifying student learning by making it collaborative and visible. Having students explain their thinking is a great way to solidify their understanding, and share with an authentic audience. However, one of a teacher's biggest challenges is preventing student recordings from being inundated by background noise from a classroom. In addition, contrary to popular belief, teachers are limited with financial resources. This can make it challenging to obtain items that will streamline the learning journey of students.
DIY and Pre-made Options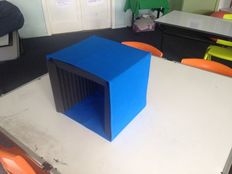
Search online and you will find many viable options for designing your own inexpensive vocal recording booth. Check out this blog post on The Adventure of 21st Century learning. This post provides step-by-step directions for creating an inexpensive vocal recording booth.
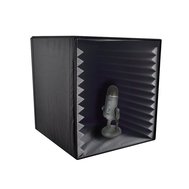
For those that prefer to purchase vocal recording booths, you can find options on Amazon. Here is one option for around $40. Here is another option for roughly the same price. Phone vs. Headphones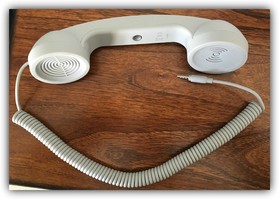
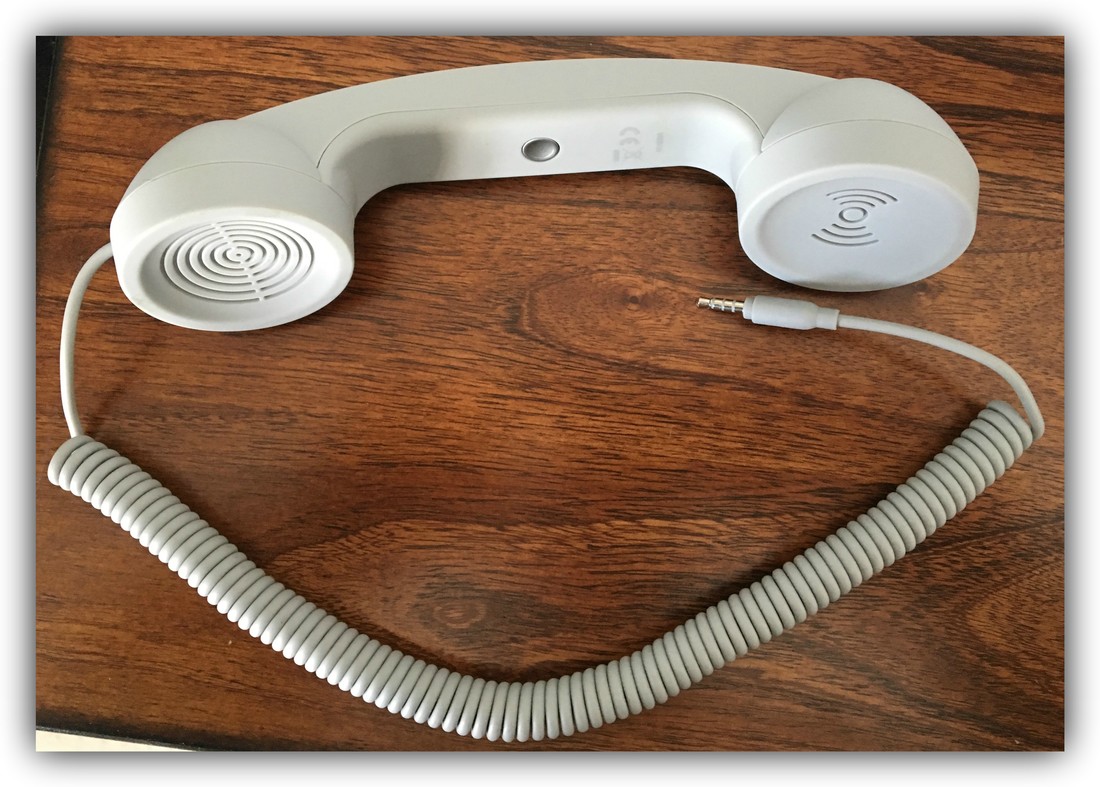
One of my favorite options is the Native Union Pop Phone. This is available on Amazon and ranges in price from $7.99-$14.99 depending on the color or pattern you select. This simply plugs into your tablet, phone, or computer and allows you to begin recording. Another cool feature is that you can listen to your recording on the telephone. Below are some examples of recording with and without the Native Union Pop Phone.
Recording: WITHOUT Pop Phone
Here is an example of recording without the Pop Phone. Don't mind the music. I needed some background noise to showcase how much of a difference the Pop Phone makes when recording.
Recording: WITH Pop Phone
This inexpensive phone makes a world of difference with drowning out background noise while amplifying the student's voice.
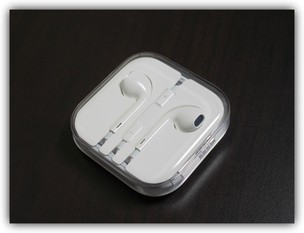
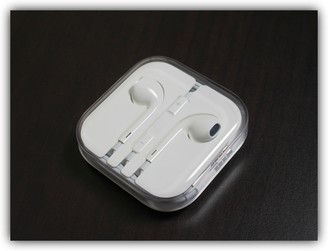
Another option you might already have access to is the earbuds that come with your Apple products. Ask parents for any extra ones they may have at home. No need to have students put the earbuds in their ears. Instead, have them talk into the white, rectangular piece on the cord that serves as a microphone when using the earbuds to complete hands-free calls on your phone. Below are some recordings with and without the earbuds being used.
Recording: WITHOUT EARBUDSRecording: WITH EARBUDSFinal Thoughts
What did you think? You can definitely tell a big difference in recording without the assistance of a microphone. The earbuds are a great option that you might be able to get completely free of charge from your students' parents. However, the Pop Phone, in my opinion, does a significant job of drowning out background noise. Why not give your students the joy of talking on a "corded phone"?
1 Comment
 I have been using Kidblog the last three years. Their iPad app makes posting and commenting seamless for my first graders. Each one of my first graders has his/her very own blog to share and document learning throughout the school year. It has been my goal to use the iPad as a creative tool. We have been talking about using "is" or "are" in sentences. Students have made the connection that "is" goes with a singular subject while "are" belongs with plural subjects. To create a short assessment and add some fun, we used our iPads and Kidblog to practice our understanding of using "is" and "are" in sentences. Below I explain how we went about this process. It was actually pretty simple and I was very pleased with the results. During our next week of school, students will be commenting on the "is or are" posts with their guesses. is or are assessment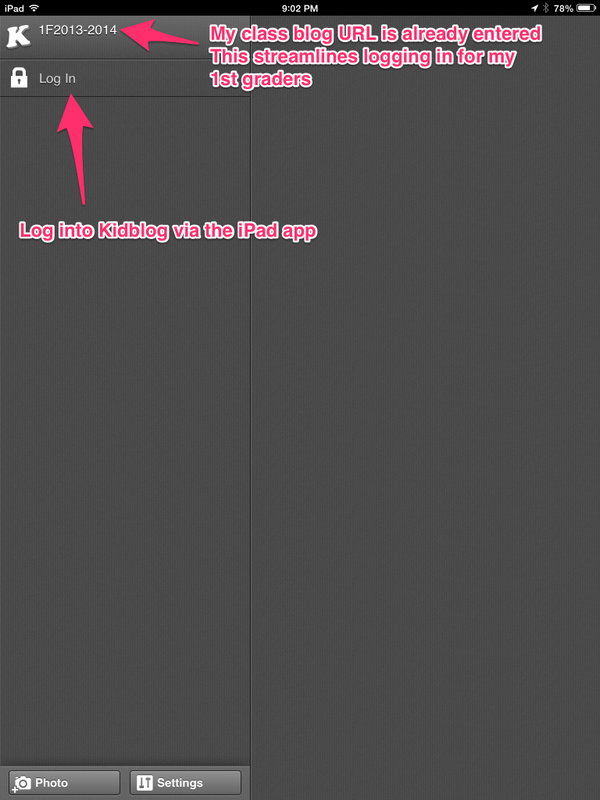 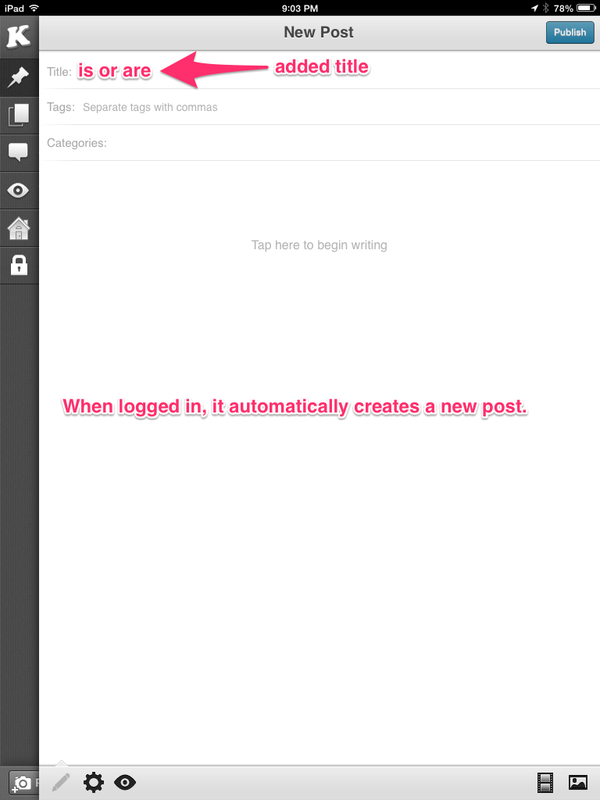 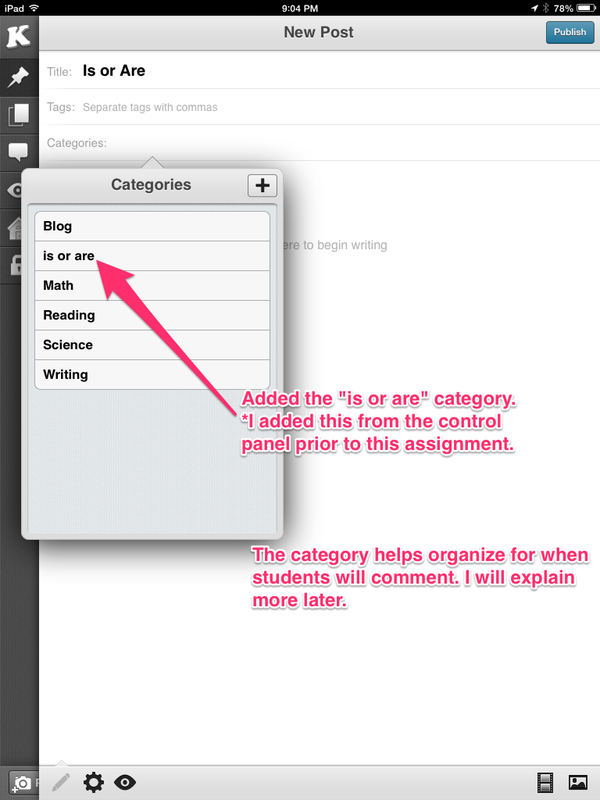 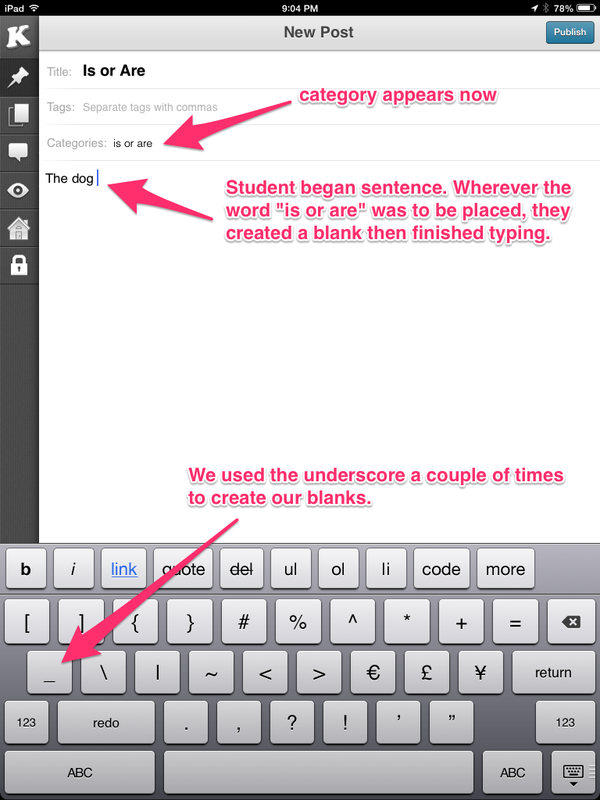 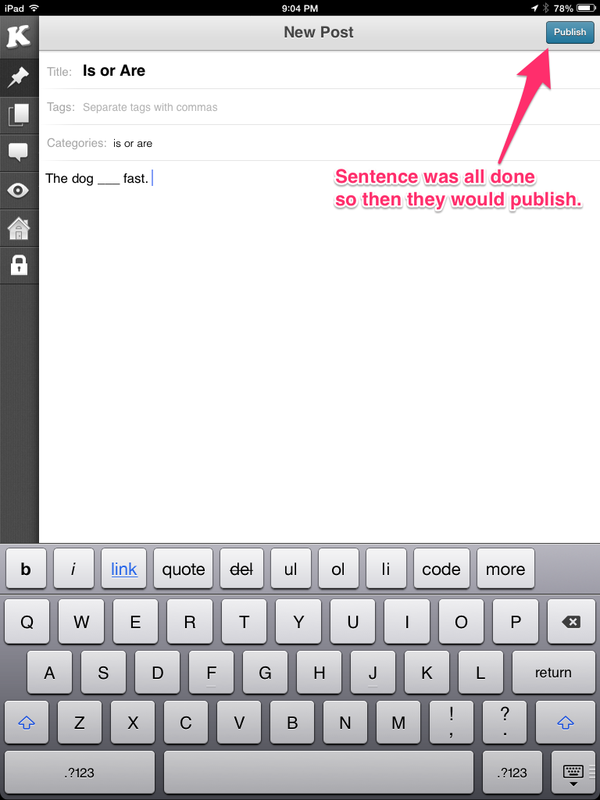 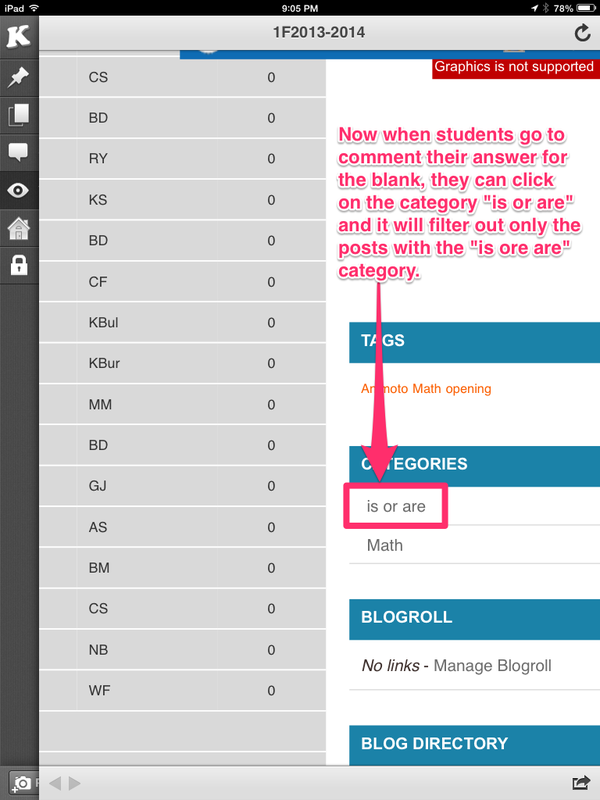 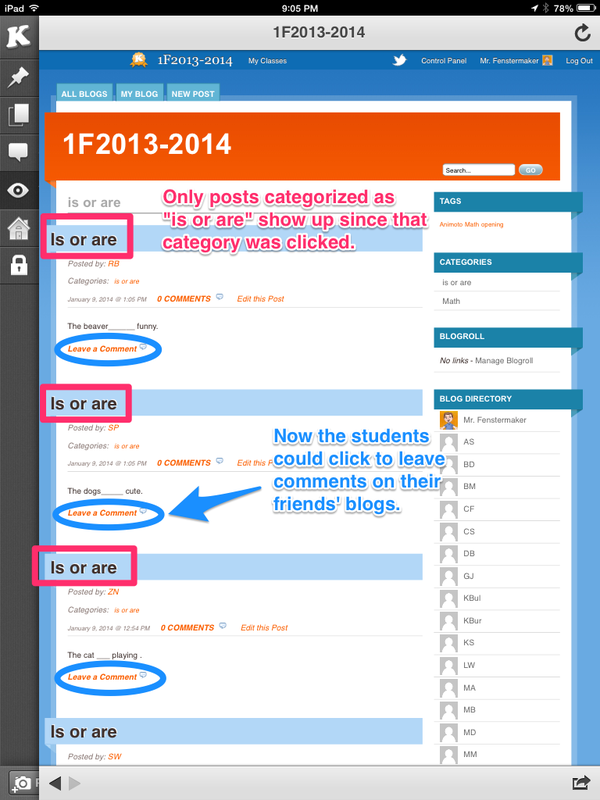 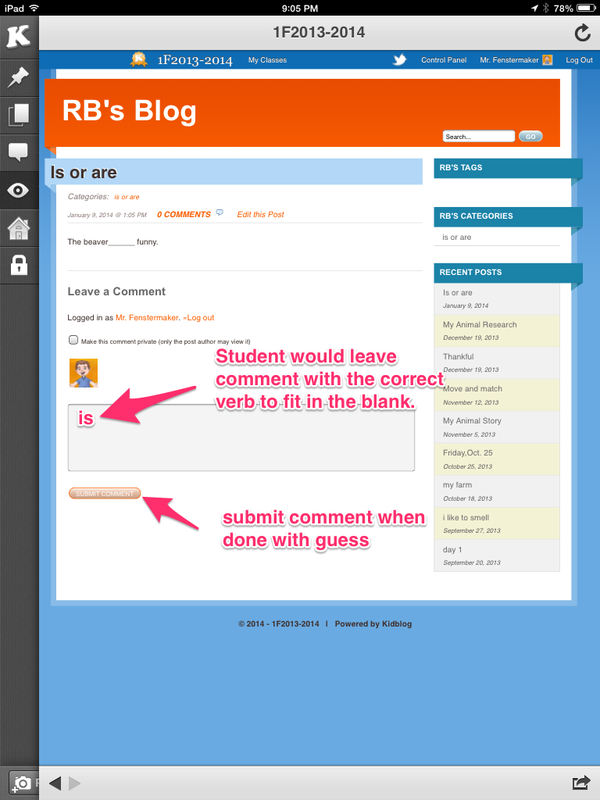 I was very pleased with the quality of sentences that my students submitted. This provided a quick assessment for who understands and who does not. The next phase will be students commenting their guesses. This will provide another layer of assessment. The best part is that the students had fun with this. They got to create their own sentences and will get to comment on their friends' posts. One Note I have my blog set up so that any new post and/or comment needs moderated before appearing. When my students begin commenting their guesses, none will show up until I approve them. This is nice because students will not be able to see what others guessed. They will have to decode the sentences on their own and apply what they have been taught. Share This: Getting back into the groove after winter break can sometimes be a challenge. My first graders are always eager to share all about their presents and trips from break. I learned about a new app called Chatter Pix Kids from Richard Byrne. This app looks like a simple way for students to share their adventures from winter break. I plan to have my students record a short talking picture about their winter break. After they have created their talking pictures, I will have students save them to the camera roll which will allow them to be uploaded to Dropbox. I will then take all the talking pictures and combine them into one video. This final video will be added to the class blog so that all the students/parents can access to learn about winter break adventures. Screen shot directions From the main screen, students are able to select "take photo." 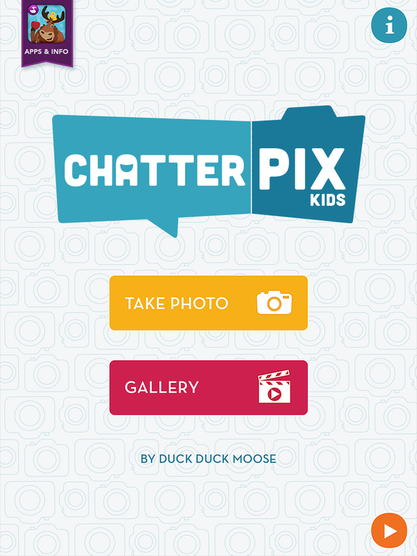 When adding a photo, students can snap a picture or access the camera roll to import previously taken pictures. 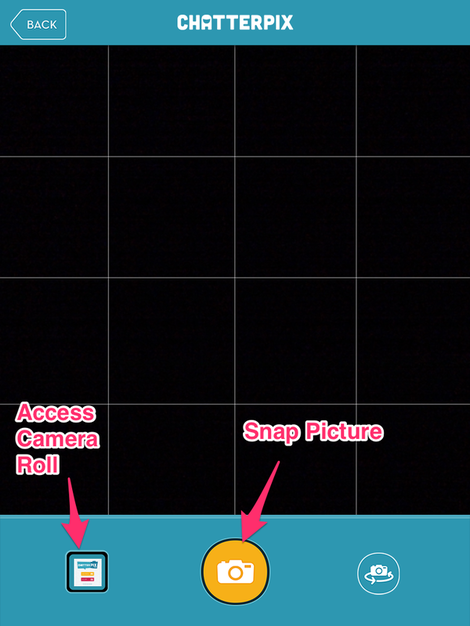 After the image is imported/taken, students will draw a line where the mouth should move to talk. Then hit record to begin the recording. 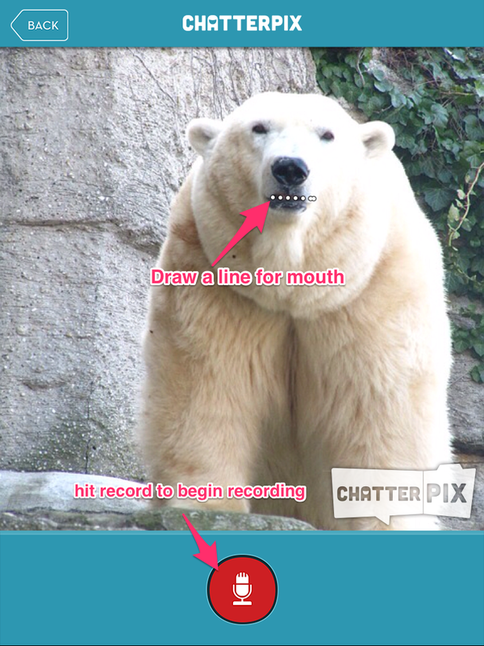 A timer will be displayed when recording to show how much time is left.  After the recording has been made, students can then add filters, stickers, a frame and text before exporting their final project. 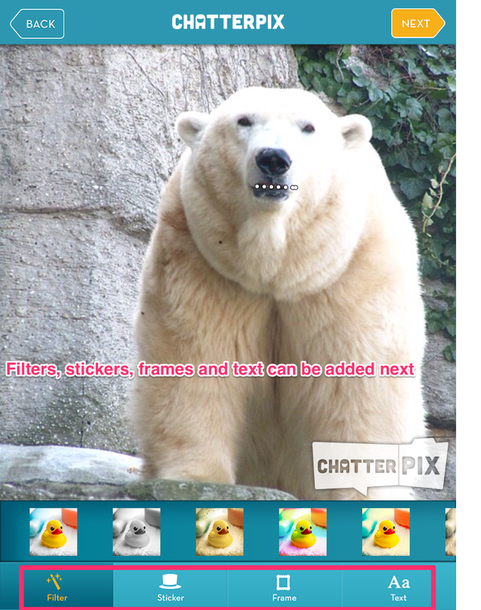 The last step would be saving it to your local "gallery" which is stored within the app on your iPad. You can also choose to save it to your camera roll for easily exporting it to other sites, social networks or even emailing it. 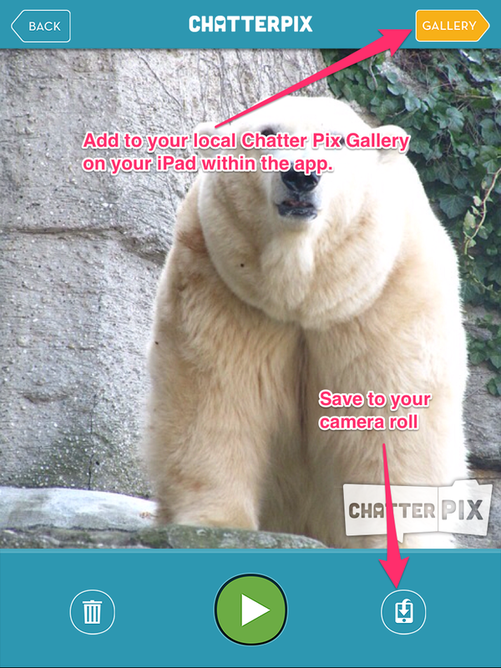 Below is a walk through of the app in action. 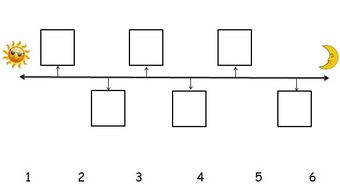
My 1st graders used the iPads to check their understanding of timelines. We had been exploring timelines in a recent math lesson and I wanted my students to practice arranging events on a timeline. In order for my students to relate to the events, we practiced placing events from a typical day at school in the correct sequence. There were a total of six events that needed to be placed into the correct box on our makeshift timeline. There was a sun placed a the beginning to represent morning and a moon at the end to represent night. It was up to the students to place the number in the correct box. Below are the steps I used to create this activity. Timeline
I used Microsoft Word to create my timeline worksheet. I added a sun at the beginning and a moon to the end. The numbers at the bottom were for students to cross out as they began writing numbers in the boxes. This was to help alleviate scanning the same QR code over and over. QR Codes
I used the website QR Voice to create my QR Codes. This is a site that you type the text into the box. QR Voice automatically generates a QR code. When this QR Code is scanned, the text that you typed is read aloud to the person who scanned it. While I could have used a QR code that would simply display text only, I chose QR Voice to help with my students that are transitioning to independent readers. 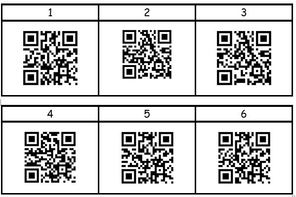
Above are the QR codes that I created using QR Voice. I put them into a table in the same file that I created my timeline worksheet. I was able to print these, cut them out and tape them up around the classroom. *Make sure to leave the number with the QR code so the students know which "event" is associated with each number. Events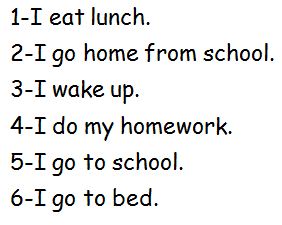
Above are the events from our typical school day. You can see that the numbers next to each event are not in the correct order. I told students when putting numbers in the boxes on the timeline that they would not just put 1,2,3,4,5,6. ActivityStudents would use the Qrafter app on the iPad to scan a QR code. Once scanned, the "event" would be read aloud to the student. For example, if QR code with the number one above it was scanned, the student would hear, "I eat lunch." It was the students' job to place the numbers in the correct box on the timeline. ReflectionThe students really did a good job with this activity. It required them to keep track of the events that they heard and place them in the correct order. Some students even wrote the "event" sentence next to each number on their worksheet before starting to place numbers into the timeline boxes. Problem solving in action. Love it.
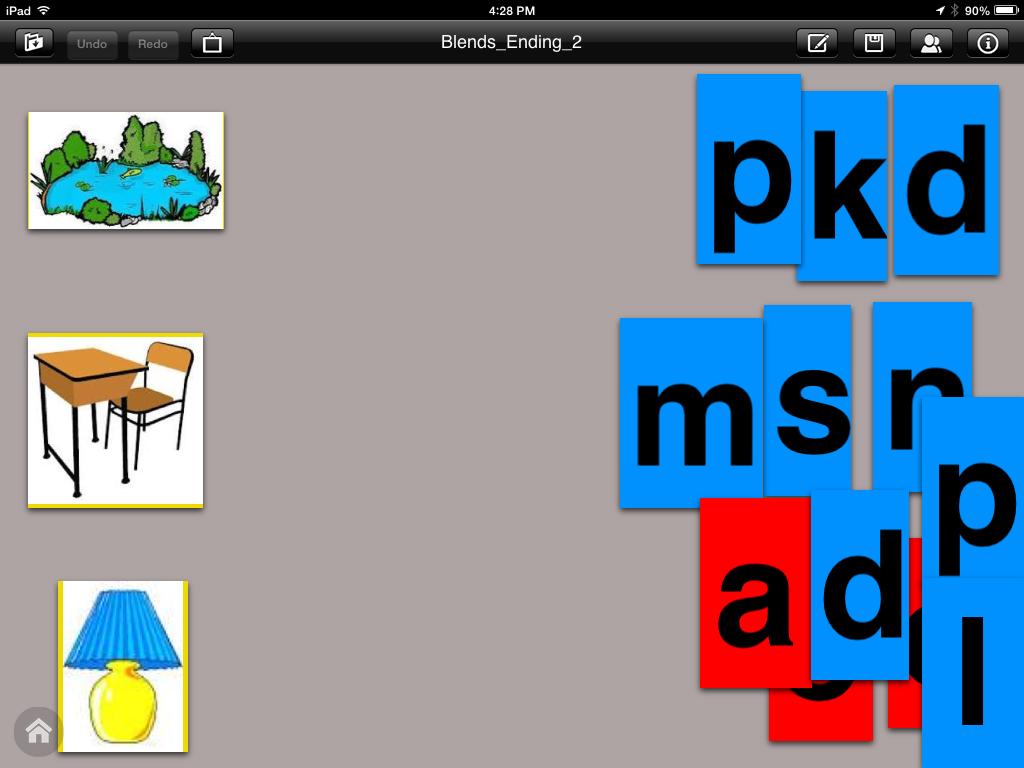
TWEAK Students could use the Educreations app to snap a picture of the timeline worksheet. They could then annotate over the picture writing the numbers in the boxes with digital ink. When they completed the timeline worksheet via Educreations, they could embed the video onto their blog or send the link to the teacher to check their work.  I was scrolling through the daily list of Apps Gone Free and found the Move and Match app that was free for the day (regularly $1.99). This app is very simple to use. Just like the name implies, you can create activities for your students to move and match images and/or text. My students used this app to practice building words. Below is a sample of what I did to complete this activity.
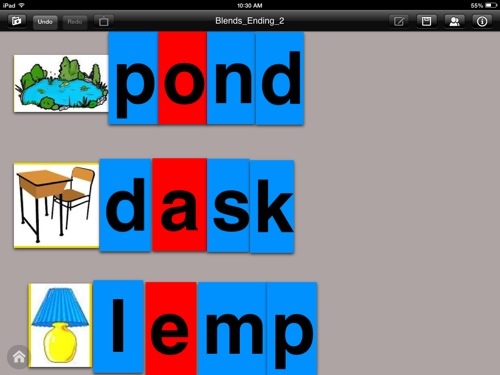
The Set up.....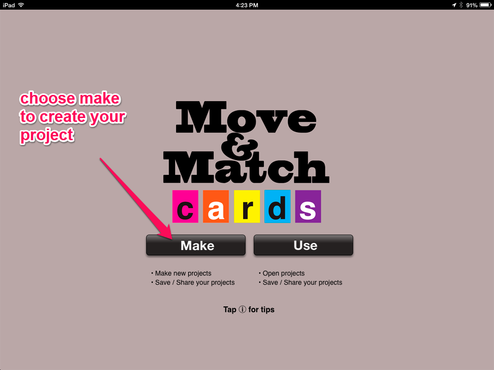  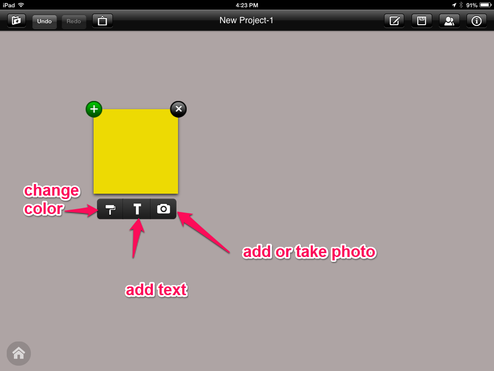 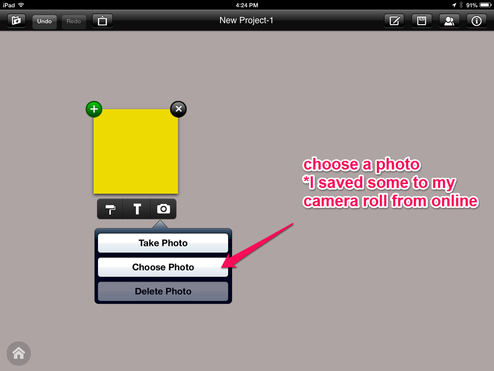  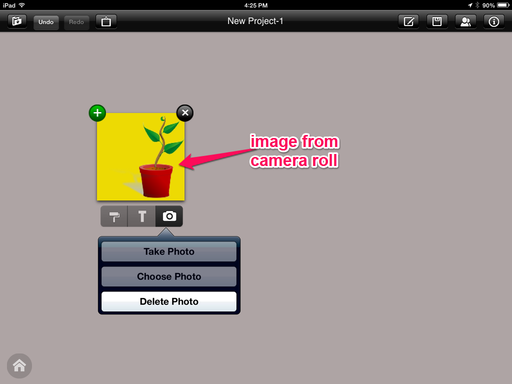  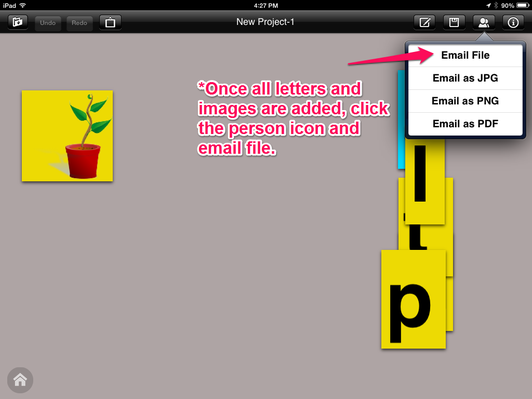 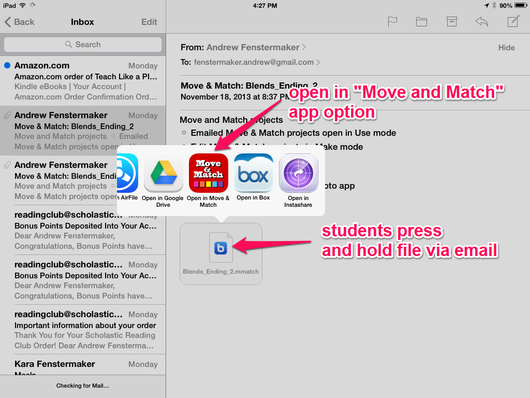 I found this process to be very simple to create some activities. Students enjoyed sorting letters and their sounds. They had to isolate each phoneme and blend the individual sounds back together creating the word that matched the picture. Both phonological and phonemic awareness were being practiced by students.
When students were completed with their pictures, they would take a screenshot by pressing the home and power on/off button simultaneously. After they had captured their image, they would use the Kidblog app to sign into their blog account. This image was then embedded into each students' individual blog account. The next step is to have students create their own activities for others to complete. I will be posting more about that soon. Make sure to check out the Move and Match website for more ideas and information. 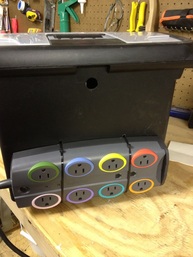 When using iPads in the classroom, you may need an inexpensive way to store your newly acquired iPads. If you share them between some team members, you may also need a simple way to transport the iPads back and forth. I have previously posted about iPad Storage. I used a plastic file organizer to create a carrying and storage tote for the iPads. To better explain how I went about creating this storage box, I created a short video. Check out the video below for a walk through of creating this storage box. I came across the Conojo app ($1.99) via Lifehacker. The video above does a great job of sharing the apps functionality in a nutshell. The video instantly made me think of the other screen casting apps such as Educreations, Explain Everything, ShowMe and ScreenChomp.
One of the biggest differences that caught my eye was the collaboration component. You are able to connect via Bluetooth and collaborate together. I have loved the screen casting apps for my first graders because they allow my students to model their understanding of concepts. I think the Conojo app has some great potential to allow more than one student to collaboratively work on representing their understanding of concepts. Recently I had the privilege of attending the ITEC Conference in Des Moines, Iowa. There were so many great teachers and connections to be made. I also was able to present while at the conference. My presentation was about using iPads in the primary classroom. It was geared towards grades K-2. Below is the presentation that I gave. The apps that I shared are linked to examples that I have used in my classroom. These examples include blog posts, videos or student examples. My goal was that this presentation would  Croak.it is an app that allows you to record audio for 30 second chunks. It has a very simple user interface. Simply press the giant button with a frog and press again to stop. You can then title your recording. Once titled, your Croak is given a URL that you can share. See my example  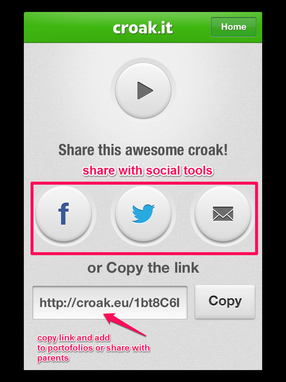 Vocabulary Practice with Thinglink You can practice vocabulary using Croak.it and Thinglink. Students can hand write their vocabulary word. After writing their word, they can snap a picture of it. Next, they can use the Thinklink app to add links to their image. The links they will add would be their recordings from Croak.it. The recordings via Croak.it could be examples of the word in a sentence.  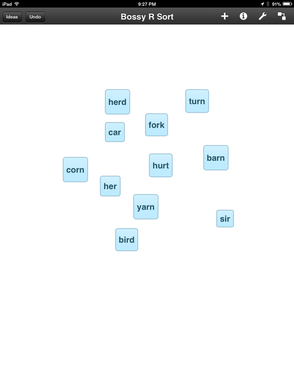 We learn about bossy "r" words during 1st grade. After we have talked about all of the bossy "r" combinations, we use the Idea Sketch app to practice sorting words based on their bossy "r" sound. Below are some visual steps for this process. 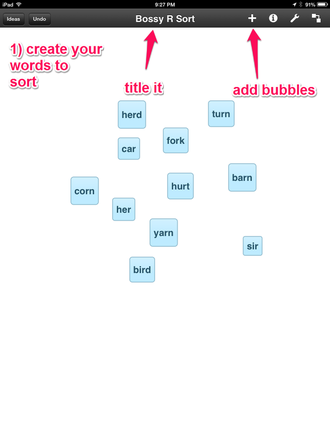 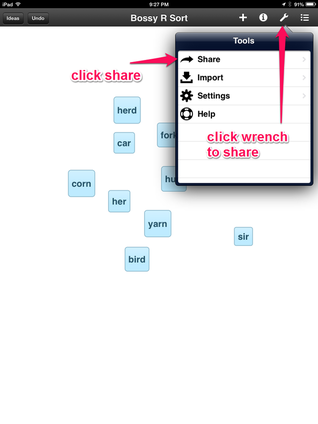  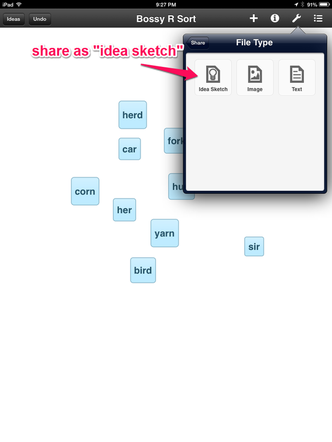 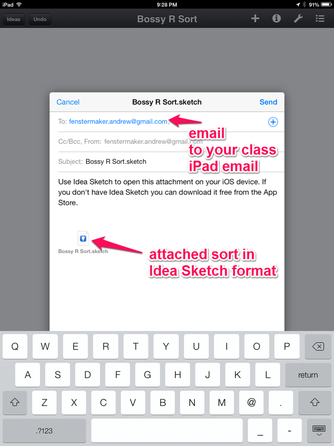 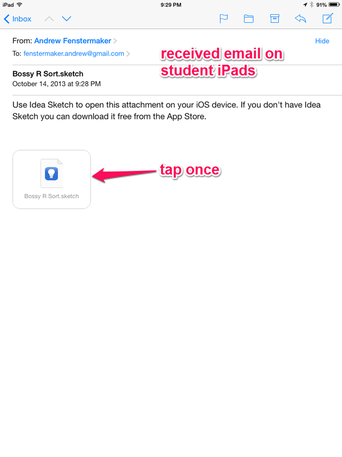 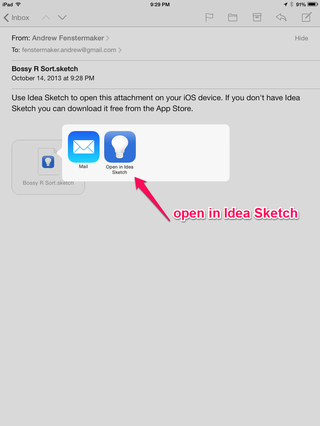 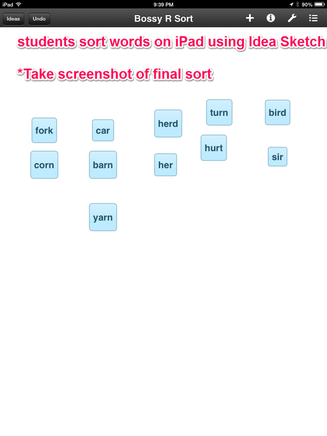 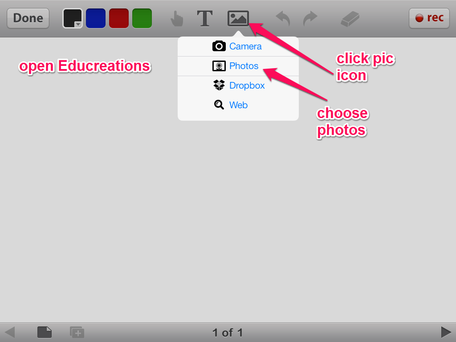 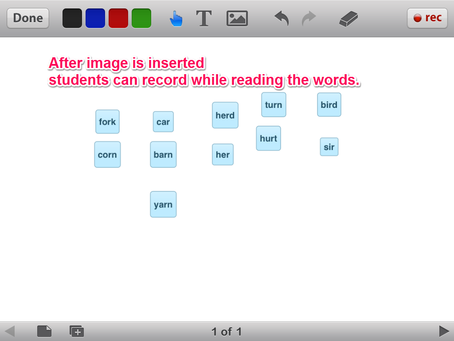 Below is an example of a final product created by a student. |
Andrew FenstermakerInstructional Technology Coordinator | Innovation Coach | Google Certified Innovator | Presenter | Blogger | Adjunct @UiowaEducation | Owner @kids_f_i_r_s_t 


|
 RSS Feed
