I previously posted about creating a rubber band gun using an Arduino Uno. I had set out to build the rubber band gun for a STEM summer camp that I will be conducting this summer. I am doing some work with Arduino micro controllers and wanted something for students to do that was more than making an LED blink on and off.
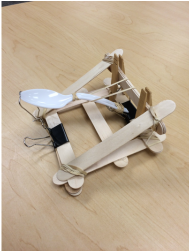
After completing the rubber band gun, I thought about making a catapult. Rather than using two servo motors like the rubber band gun, I planned to use just one servo motor for the catapult. While the catapult was more difficult to build than the rubber band gun, both projects were equally enjoyable and I am excited to see how students do with these projects this summer. Materials
If you watch the how-to video, I left out some of the materials. Below is a list of materials I used during the construction of the catapult.
1. Arduino Uno 2. Potentiometer 3. Breadboard 4. jumper wires 5. jumbo craft sticks 6. rubber bands 7. binder clips 8. plastic spoon 9. paperclip 10. clothespins 11. hot glue gun 12. needle nose pliers Breadboard layout and codeStep-by-step directionsShare This:
5 Comments
 I am beginning a new adventure with learning Arduino. I am the true definition of a noob in this realm of technology. I taught a STEM summer camp during the summer of 2014. We used Sphero Robots to practice coding. The kids loved it, but when camp was over, so was their ability to explore with Sphero unless they went out and bought one on their own. This is what initiated my exploration with Arduino. I wanted a tool for students to be able to hack, tinker and engineer. In addition, I wanted something that they could keep and continue to learn beyond the summer camp. With the -25 temperatures, it is hard to think that summer will be here soon. My goal this summer is to provide a beginner's camp on Arduino for 5th and 6th grade students. When the camp is over, these students will be able to keep the Arduino and some other supplies to continue their learning. My Initial Supplies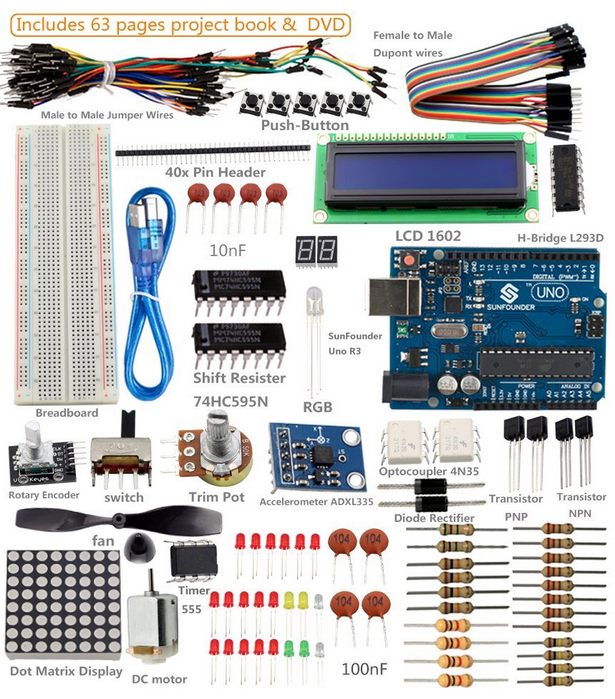 I looked around at sites such as Adafruit, Sparkfun, and Amazon. I eventually decided on the kit pictured above. It is a Sunfounder New Uno R3 Super Starter Kit. It cost me a little under $50 for the kit. It looks like it has more than enough supplies to stress my brain out over the next few months. 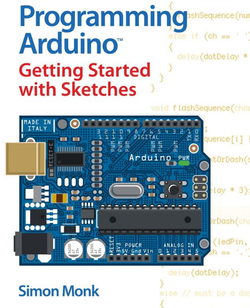 With my Sunfounder kit, I also purchased a book by Simon Monk called Programming Arduino Getting Started with Sketches. It was a highly recommended from the book I was reading titled Invent to Learn. As I mentioned, I am a complete beginner and have no prior experience with programming using any kind of computer language. My class did use Scratch in the fall during the Hour of Code. I was able to get Sprites to move around, talk, disappear and reappear. However, that is about as extensive as it gets with programming for me. While I waited for my kit to arrive, I read atutorial that I found linked fromAdruino's Website. As I was reading through it, I used Autodesk's web app called 123D Circuits. This resource allows you to virtually create circuits using an Arduino Uno and other electronic components. Below is a video about my learning so far. Share This: |
Andrew FenstermakerInstructional Technology Coordinator | Innovation Coach | Google Certified Innovator | Presenter | Blogger | Adjunct @UiowaEducation | Owner @kids_f_i_r_s_t 


|
 RSS Feed
