 Recently we began studying about early colonies in social studies class. In an attempt to make the study more interactive and engaging, we utilized Google Maps to create our own maps. Not only did the students mark some of the colonies, but they were able to add their own information to each place marker they added to their maps. This idea was initiated while attending the ITEC conference in October. I attended a Google Map making session presented by Jim Sill. I didn't know how making Google Maps would apply to my own classroom, but I had heard great things about him and decided to attend. It was a game changer for sure. You can see an example of the final maps here. I will outline the steps of this process below. My students really enjoyed this activity. It really helped them connect with current day United States and where colonies were established hundreds of years ago. The Map Making process Step 1: You will need to visit maps.google.com We are a GAFE so all my students were logged into their Google Accounts when navigating to maps.google.com Step 2: Click into the map search bar and you will be given the option "My maps". 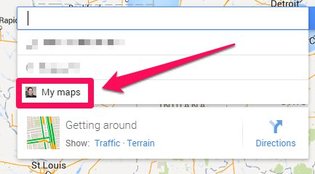 Step 3: Click create to begin creating your own map 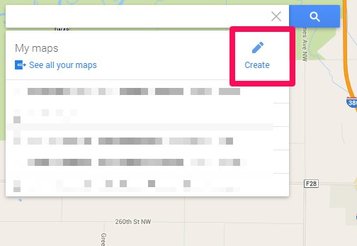 Step 4: Rename your map and rename your first layer according to your project. We renamed our first layer to "Early Settlements." 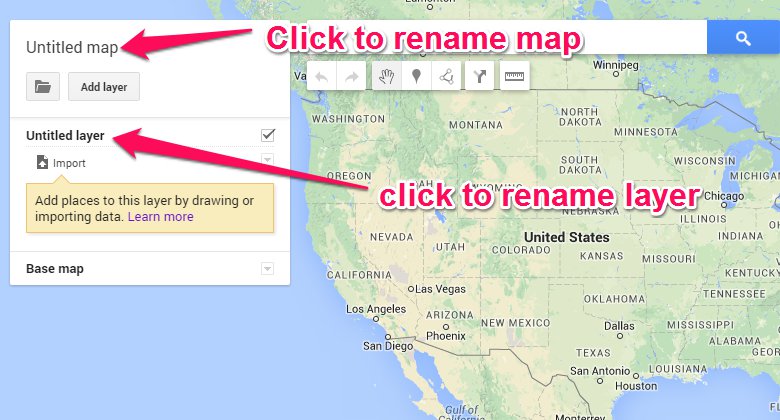 Step 5: Type the name of your first location you want to add to your map by typing its name in the Google Map search bar at the top of your map. You can then choose to add the location to your map. 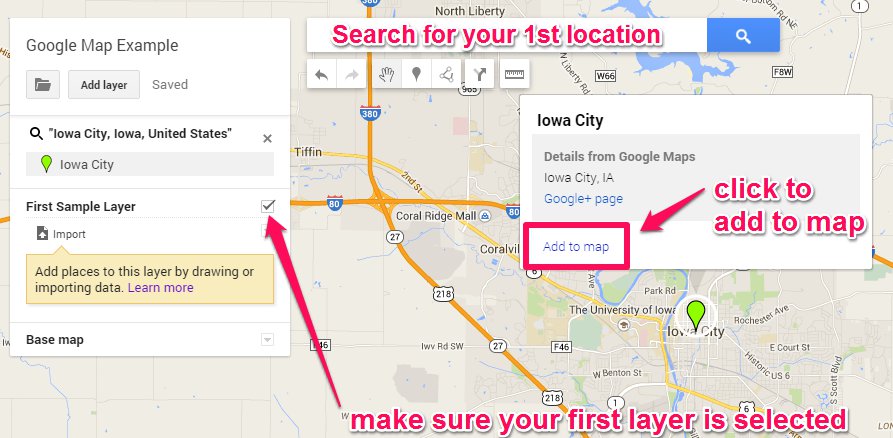 Step 6: After you have added one location to your first layer, you should now have a "data" option for your first layer. Select this "data" option to change your data fields. 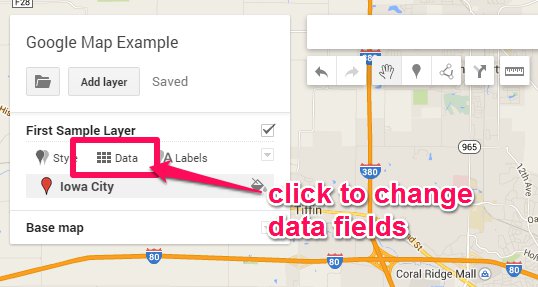 Step 7: Once you have clicked "data", a small insert will open that looks like a Google Sheet. You can then add/delete columns. You only need to do this once for this layer. Every time you add a new location for this layer, the data fields will apply to every location you add. 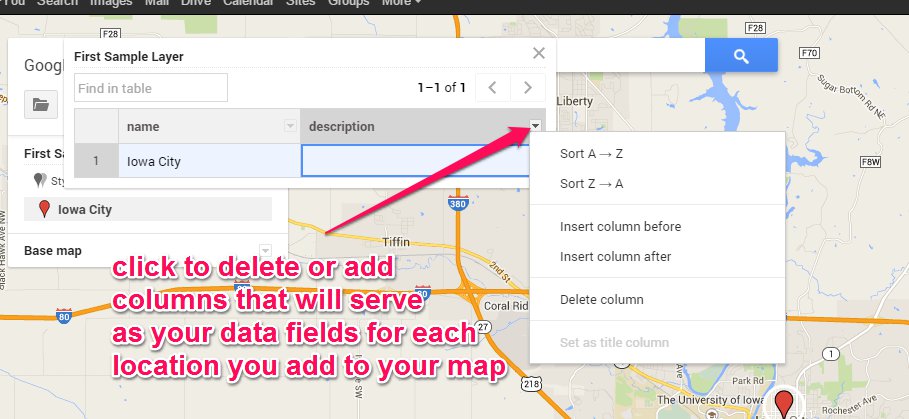 Step 8: After you have customized your "data" table, you can then add more locations to your chosen layer and customize the information for each location you add. 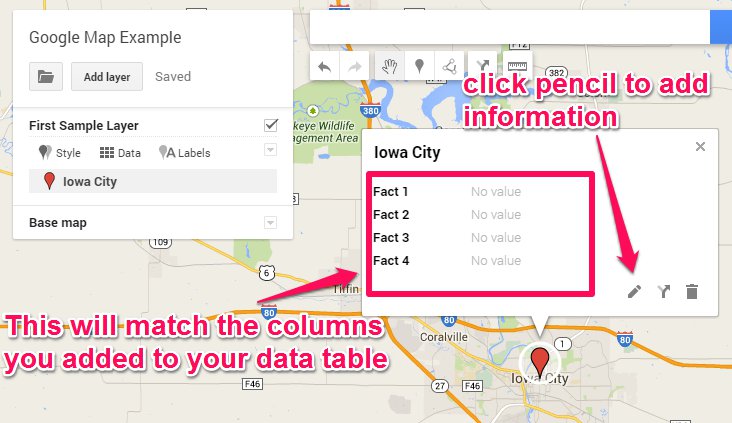 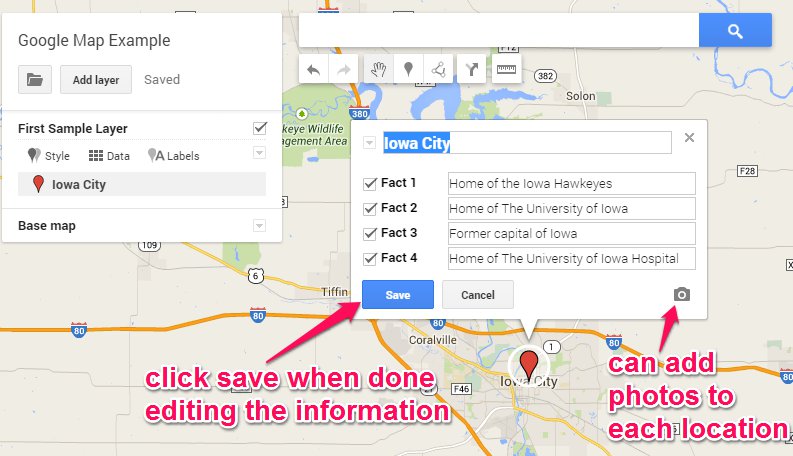 Step 9: You can continue to add more locations to your layer. You will be able to fill out information about each location you add. In addition, you can add more layers. However, when you add a new layer, your "data" table will need to be created again. Your data tables do not transfer from one layer to the next. Conclusion I was able to apply this Google Map making process to my social studies classroom. There are tons of other ways to integrate this across curricular areas. Check out Jim Sill's page on ways to integrate both Google Earth and Maps into your classroom. Share This:
0 Comments
|
Andrew FenstermakerInstructional Technology Coordinator | Innovation Coach | Google Certified Innovator | Presenter | Blogger | Adjunct @UiowaEducation | Owner @kids_f_i_r_s_t 


|
 RSS Feed
