I previously posted about creating a rubber band gun using an Arduino Uno. I had set out to build the rubber band gun for a STEM summer camp that I will be conducting this summer. I am doing some work with Arduino micro controllers and wanted something for students to do that was more than making an LED blink on and off.
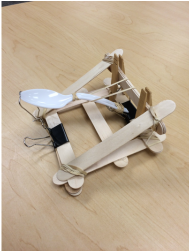
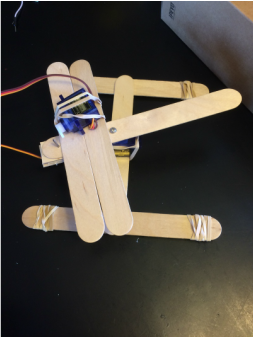
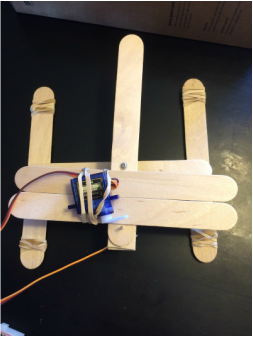
After completing the rubber band gun, I thought about making a catapult. Rather than using two servo motors like the rubber band gun, I planned to use just one servo motor for the catapult. While the catapult was more difficult to build than the rubber band gun, both projects were equally enjoyable and I am excited to see how students do with these projects this summer. Materials
If you watch the how-to video, I left out some of the materials. Below is a list of materials I used during the construction of the catapult.
1. Arduino Uno 2. Potentiometer 3. Breadboard 4. jumper wires 5. jumbo craft sticks 6. rubber bands 7. binder clips 8. plastic spoon 9. paperclip 10. clothespins 11. hot glue gun 12. needle nose pliers Breadboard layout and codeStep-by-step directionsShare This:
5 Comments
Summer Camp This summer I will be conducting a STEM camp. This will be my second year of doing this for students in the school where I teach. I wanted to try and add something different for 5th/6th graders. This summer I will be doing a week long camp over Arduino. Each camp participant will receive an Arduino Uno. We will be learning some of the basics of Arduino during this week long camp. In addition, students will get the chance to complete a couple of projects. Rubber Band Gun Rather than focusing only on projects with LEDs, I decided to incorporate some servos and potentiometers. One project students will build is a Rubber Band Gun. Students will use two servos to control the side to side movement and the firing of the rubber band. The potentiometers will control the servo rotating the gun and firing the gun. Below is a video explaining the steps of the process. Breadboard layout Below is how I wired everything up. If you click on Code Editor, you can see the code that I used to make this rubber band gun work. If you have suggestions for improving the code, I would love to hear. I am very new to this process and sure that there is a better way to wire this up and program it. Background with Arduino I continue to be blown away by the power of the internet. As of a month ago, I had never touched an Arduino or done anything with programming. Since purchasing an Arduino Uno, I have scoured the internet for articles and videos about getting started with Arduino. I am still very new to programming, but love the limitless possibilities with the Uno board and other electronic components. It will be a great resource and tool for working with 5th/6th grade students this summer. 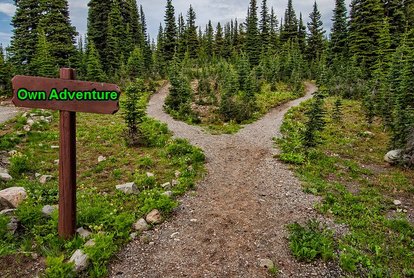 The Template For a recent writing project, we had 5th graders complete a "Choose Your Owen Adventure" story using Google Forms. We chose to use Google Forms for a couple reasons. 1) We are a GAFE district which means each student has his/her own Google Account. 2) Google Forms provides a simple structure for adding text, images, pages and linking between pages based on answers. To get the project started, I created a story map (flow chart) to assist with getting ideas on paper. In addition, this story map provided specifics for which page each question/answer should link to during their story. When I created this story map, I allowed for two different levels of difficulty. Both of these options are provided in the example below which you can download and use as you would like. Feel free to tweak it and make it your own. Beginner Format To use the beginner format, you will need pages 1 and 2 from the story map template listed above. This format provides a total of 15 pages in your Google Form. Below is an example of how you could lay out the papers in the beginner format to visually assist with the flow from one level of your story to the next. 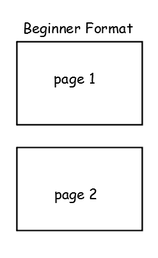 Challenge Format You will still need page 1 of the story map template. However, you will add in pages 3, 4 and 5 as well. The challenge format ends up with a total of 31 pages in your Google Form. Below is an example of how you could lay out the papers in the challenge format to visually assist with the flow from one level of your story to the next. 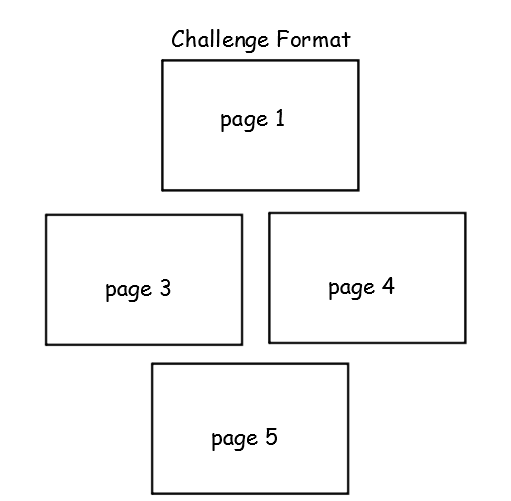 Our 5th Grade Results The 5th grade students used the beginner format to complete their Choose Your Own Adventure stories. We broke this into four different sessions. Session 1: A completed story was demonstrated for students to see the final product. The beginner story map was provided to students. They began mapping out their story. Session 2: A Google Form was introduced to students. Adding pages was demonstrated after creating a new form. Students could finish their story map and move onto creating a Google Form. Their main goal was to create a Google Form that had 15 pages. We labeled pages 2 through 15 as follows: page 2, page 3, page 4, etc. Session 3: Students were introduced to adding multiple choice questions to each page of their form. In addition, they were shown how to link to specific pages based on answers. Students spent time during this session, adding their text from their story map to the correct page in their Google Form. We had students link to the correct pages as they created their multiple choice question for each page. **Some students benefited from adding their questions to all pages first. After finishing all pages, they went back and linked. They were frustrated with creating questions and linking at the same time. Allowing them to type their questions and then go back and link alleviated that frustration. Session 4: We introduced students to adding images to each of their pages in their story. In addition, we modeled how to view their live form, copy their live form's URL and submit it to me via a Google Form that I had created. Students spent this session adding images and then submitting their final story's link to me. 5th Grade Choose Your Own Adventure Website To conclude this project, I took all the links that were submitted to me and added them to a Google Site. We originally talked about turning each Choose Your Own Adventure story into a QR Code and allowing students to scan and try out each other's stories. In the end, we went with a Google Site that students could navigate at school or home and try out each of their classmate's stories.
Choose Your Own Adventure Google Site 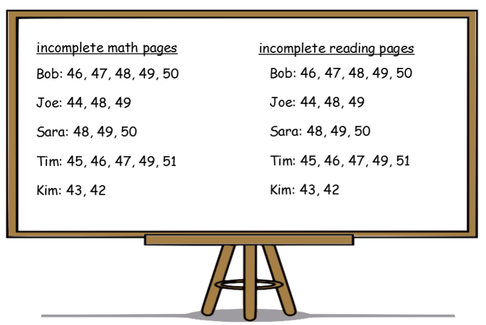 Does your whiteboard or chalkboard look like the one above? Do you have student names and incomplete work listed? Are you sick of trying to remind students of what they still haven't completed? I spent the last six years in first grade. This year is my first year in fifth grade. While it has been a nice transition, there is little difference in students taking responsibility with what work they need to finish. I feel like I am consumed with managing work that is finished vs. unfinished. Shouldn't it be the student's responsibility to manage his/her assignments? Wunderlist: My Solution My students all have a tablet that they are able to use each day in my classroom. In addition, all students either have a cell phone, iPod touch or tablet of their own. Keeping this in mind, I wanted a tool that students could continue to use well passed fifth grade. To achieve this goal, I chose Wunderlist. It is available on IOS, Android and the web. What a perfect solution. I sent home permission forms to parents about having their child create a Wunderlist account. Since we are a GAFE school, each student already has an email address they could use to register for Wunderlist. All the parents were on board with their child using this tool. Having students create the accounts went very fast. Once they had created their free account, I had them create a new list with their initials and our class code (5f). This list was to be their "Virtual Planner." After their new list was created, they shared the list with me.  Their shared lists show up in my own Wunderlist account. I can quickly see what assignments students are still working on. In addition, students are able to manage their assignments to determine what they have to complete. One of the coolest things from doing this was when students started adding other daily jobs to their lists. Some students put baseball, basketball or other after school practices that they had. I even began seeing students add chores that they had to do at home. At the end of the day when it is time to record homework, many students no longer use their paper planner, but use Wunderlist instead. It took some time initially for them to develop the habit of adding their assignments to Wunderlist. However, it has been worth the time of teaching them how to use this tool effectively. I no longer stress and have to keep my whiteboard filled with student names and their incomplete work. Using Wunderlist is teaching them responsibility and accountability for not only this school year, but their entire life. Time management is such a critical life skill and providing them with some structure and strategies for managing their time is something that Common Core does little to teach or assess. What do you think? What tools have you used for students to manage their work? |
Andrew FenstermakerInstructional Technology Coordinator | Innovation Coach | Google Certified Innovator | Presenter | Blogger | Adjunct @UiowaEducation | Owner @kids_f_i_r_s_t 


|
 RSS Feed
